
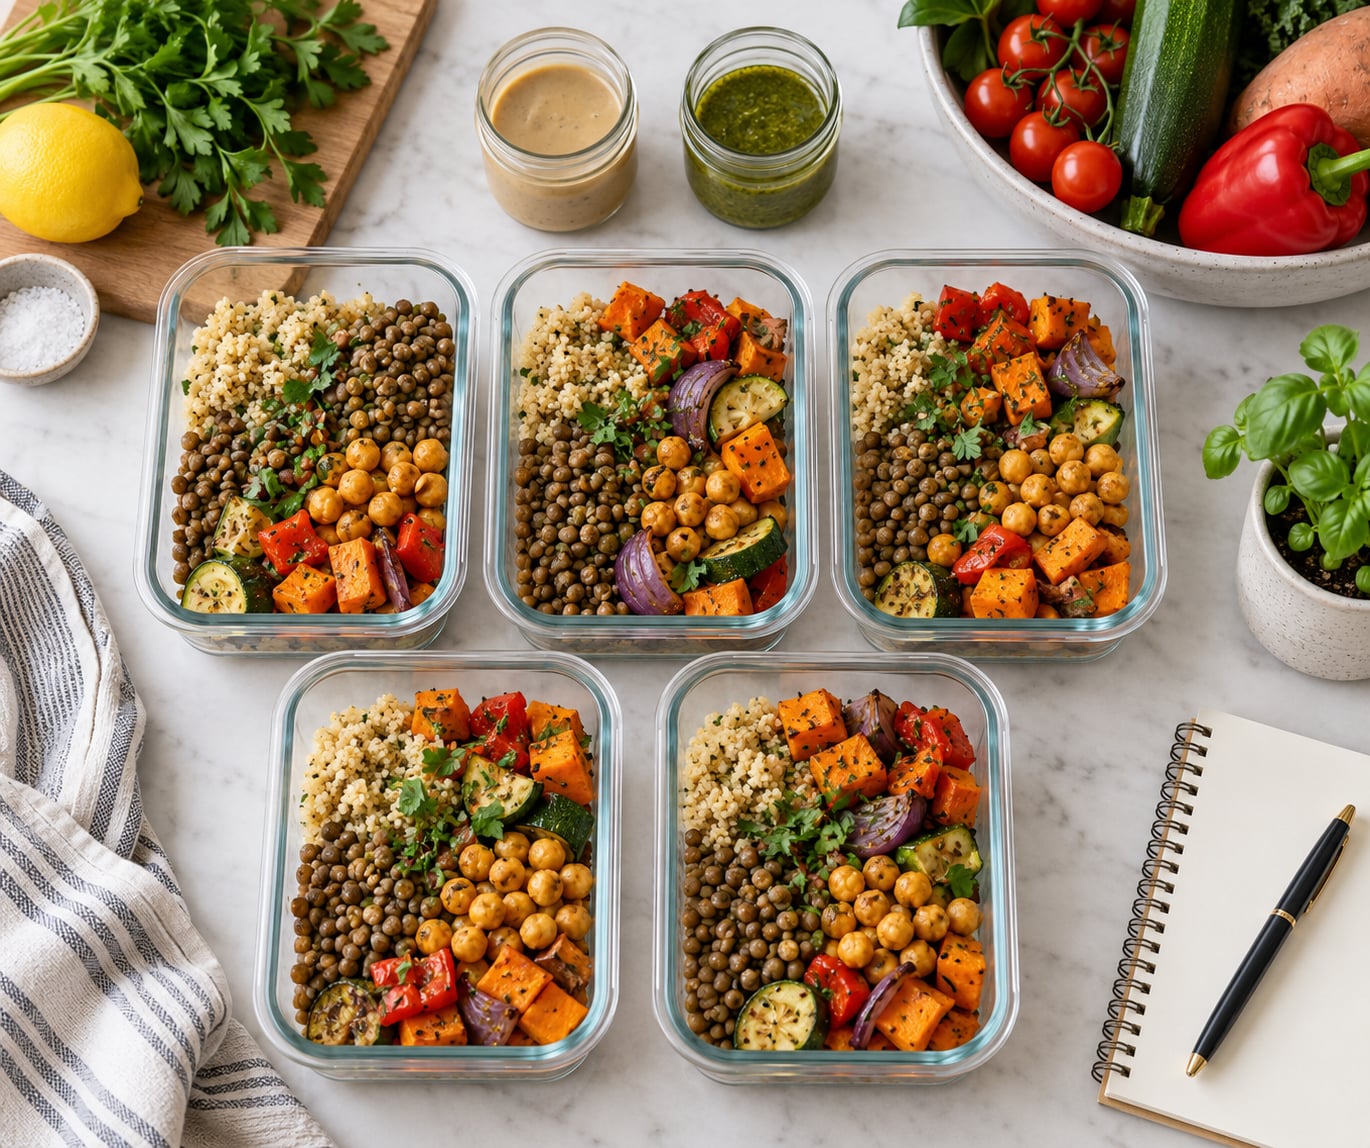
Meal prepping vegan lunches for work comes down to one ninety-minute session on a Sunday: cook a big batch of grains and legumes, roast a sheet pan of vegetables, whisk one sauce, and portion everything into leak-proof containers. From Monday to Friday you spend about five minutes a night pulling a container out of the fridge. No daily cooking, no lunch-line decision, and no sad desk sandwich by Wednesday.
I’ve packed a work lunch nearly every week for the last few years, and the system that survives contact with a real schedule is boring in the best way. Two dependable base meals you already like, three toppings that change the bowl, and one sauce you can make in five minutes. Variety comes from assembly, not from cooking five separate dinners on Saturday night.
A note on storage before we start: cooked food needs to cool quickly, get covered, and stay refrigerated at 40°F or below. If your office has no fridge, that changes the whole approach, and I’ll cover the workaround in the steps below.
Table of Contents
- What You Need
- How to Meal Prep Vegan Lunches for Work: Step by Step
- Common Mistakes
- Frequently Asked Questions
- How long do vegan meal prep lunches last in the fridge?
- Can you freeze vegan meal prep for the work week?
- What can I eat for lunch at work with no microwave?
- How do I keep meal prep from getting soggy or bland by Thursday?
- Can I meal prep 7 days at once instead of 5?
- What containers stop vegan lunches from leaking in a work bag?
- Conclusion
What You Need
The equipment list is short, and most of it you may already own. Here’s what actually earns its space in the cupboard.
Containers that close properly
Snap-lid containers with gasket seals beat twist lids for commuting. Get a mix of sizes: two or three compartment boxes for grain bowls, one wide shallow box for salads, and two small jars for sauces and dressings.
A wide, shallow container matters more than people think. Salad greens pressed into a deep box wilt from their own weight by day three, and a thin layer of rice in a flat compartment dries out far less than a thick scoop.
A wide-mouth thermos for hot food
Preheated stainless steel bottles hold a hot lunch through a morning meeting and a commute. This is the answer for offices without a microwave, and also for soups, which reheat better than most grain bowls anyway.
A sheet pan, a pot, and a small scale
A rimmed baking sheet does the vegetable work, one pot handles grains and legumes, and a kitchen scale takes the guesswork out of portioning. Volume measurements are fine at first, but weight is how you get five identical lunches without thinking.
Pantry staples grouped by job
Group the staples by the role they play in a bowl, and shopping gets faster. Protein comes from lentils, chickpeas, white beans, tofu, tempeh, and edamame. Complex carbs come from brown rice, quinoa, farro, rolled oats, and whole wheat tortillas. Fats come from tahini, olive oil, nuts or seeds, and coconut aminos in place of soy sauce.
Vegetables are the fresh part, and sauces are the part that makes food taste like you meant it. Keep two or three sauce bases on hand at all times: tahini for a lemony drizzle, peanut or cashew butter for something rich and sweet-sharp, and nutritional yeast with lemon juice for a quick savory coating.
How to Meal Prep Vegan Lunches for Work: Step by Step
Step 1: Plan a Mix of Five Lunches
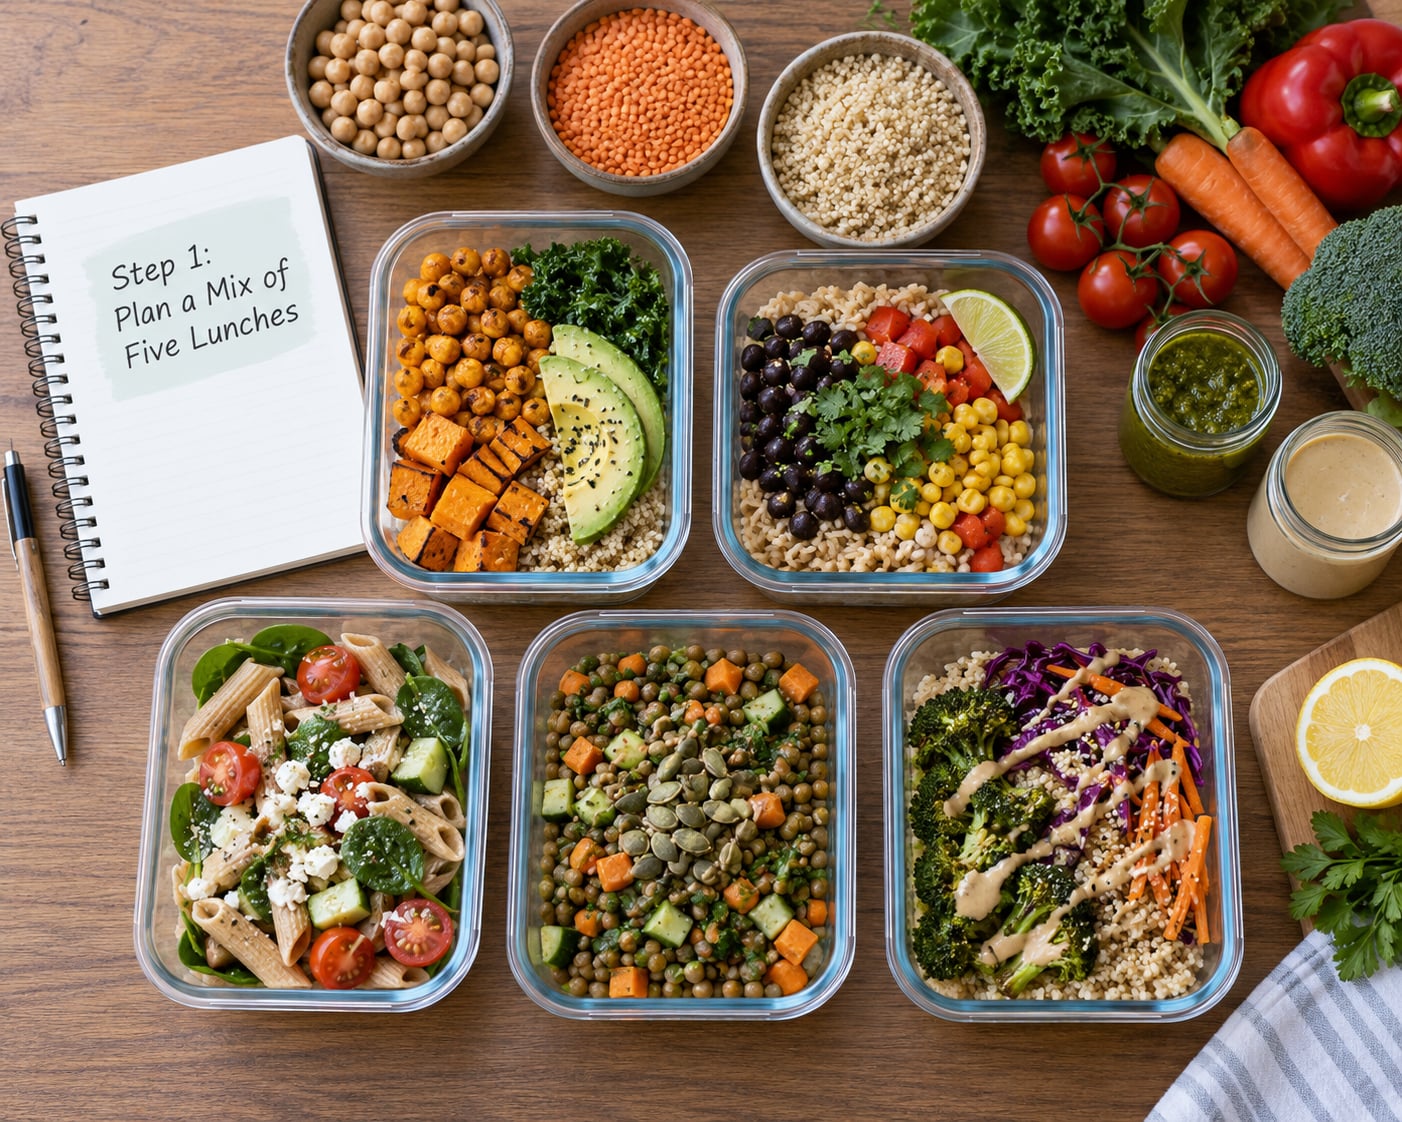
Plan two base meals and three toppings rather than five separate recipes. Base meals are things you genuinely look forward to eating on day one, like a lemon-herb quinoa bowl or a lentil and roasted vegetable curry. Toppings are the same foods used differently: chickpeas one day, tofu the next, a handful of seeds the day after.
Keep the scope realistic for ninety minutes. Three new techniques on a first attempt is one too many. If you enjoy the cooking, getting vegetables into the rotation is worth the effort; if your Sunday is already packed, check simple ways to work more vegetables into meals that your household will actually eat.
Step 2: Cook a Big Batch of Grains and Legumes
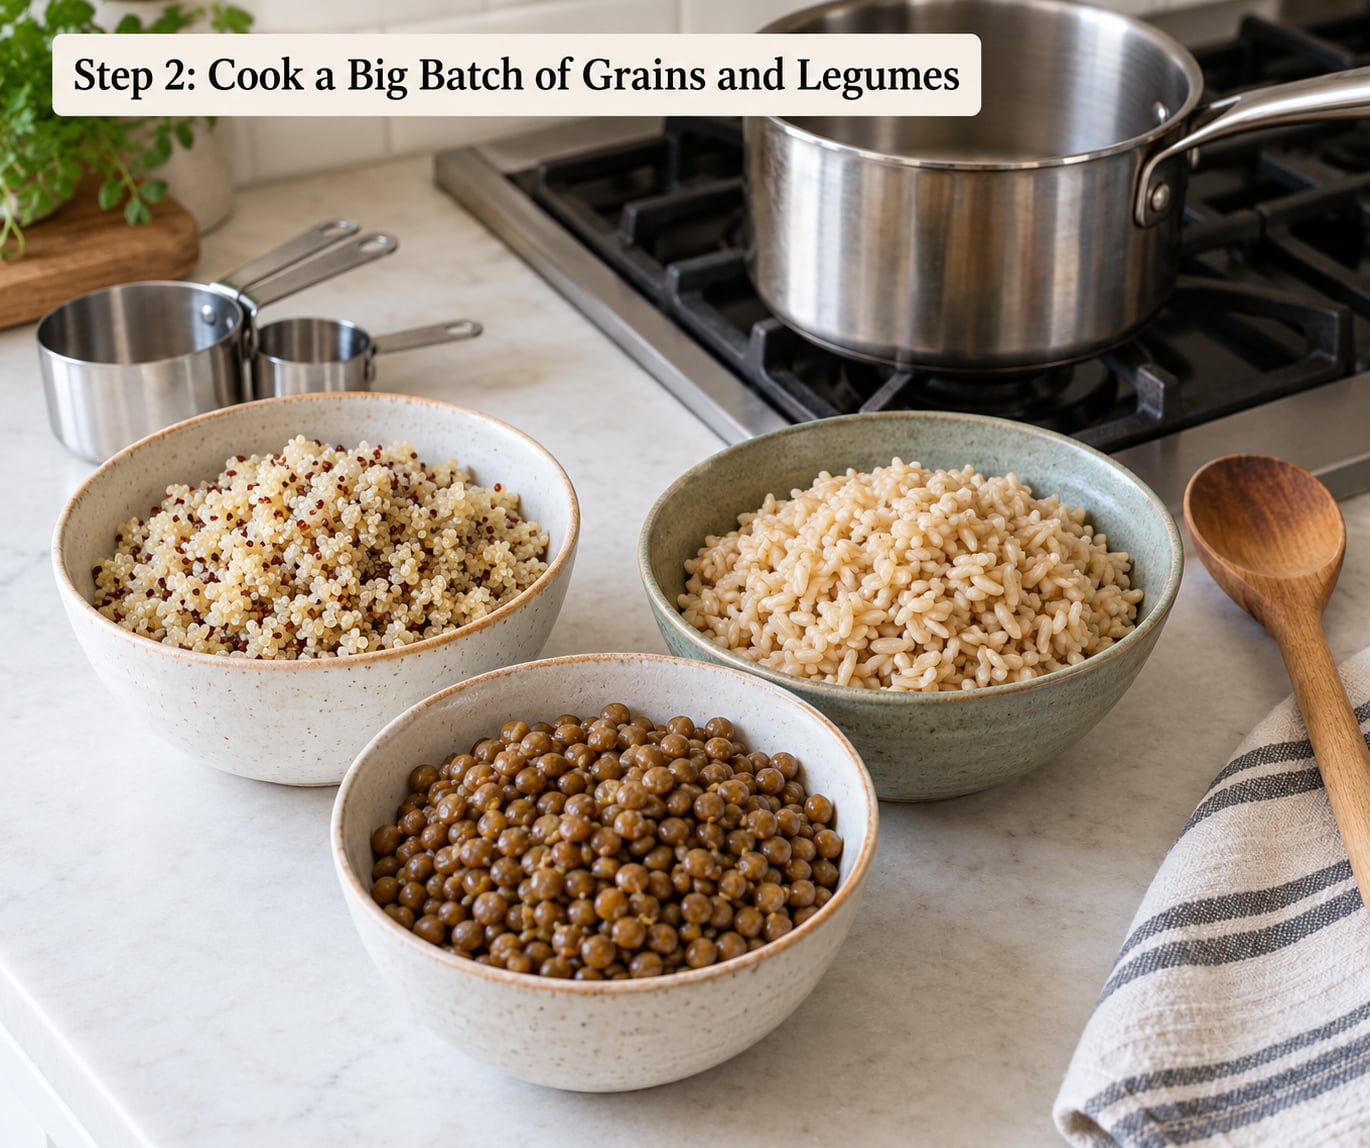
Cook one grain and one legume in the same session and you have two textures, two protein levels, and four combinations. A cup of dry brown rice and a cup of dry quinoa in one pot with two cups of water takes about twenty-five minutes, most of it unattended, and yields roughly eight servings between them.
Simmer lentils with three times their volume in water for about twenty-five minutes, or use a canned can and skip the step entirely. The canned route is not a compromise; it’s usually fresher than a batch that sat through Monday.
You’ll know it worked when the grains are dry and separate rather than clumped, and the lentils still hold their shape when you tip them into a bowl. Spread cooked grains on a tray to cool rather than sealing them warm, because steam trapped in a lid turns rice gummy.
Step 3: Roast or Steam Vegetables
Roasting is the better bet for meal prep. Cut sweet potato, broccoli, cauliflower, peppers, and squash into similar-sized pieces, toss with oil and salt, and roast at 425°F until the edges brown. A full sheet takes about thirty minutes and one pan of oven space. If you only own an air fryer, ten-minute batches at a slightly lower temperature work just as well.
Roasted broccoli, cauliflower, and carrots keep well for four days refrigerated. Mushrooms and zucchini turn watery somewhere around day two, so use those early in the week or eat them fresh.
Steam the sturdy greens. Kale holds its bite and texture far better than spinach across a work week, which is the single most useful thing I learned from packing too many sad salads. Cabbage and broccoli slaw are even sturdier, and both work as a raw topping all five days.
Store vegetables separately from the grains if you can, in their own container or their own compartment. Mixed together, steamed vegetables release water and steam the rice underneath. If greens have gone limp in the fridge, reviving wilted greens takes about ten minutes and works on anything in a container.
Step 4: Make a Simple Sauce and Two Add-Ons
Skip the six jars. Pick one fat, one acid, one salt, and whatever flavor you want, and blend it. Tahini with lemon juice, maple syrup, salt, and water thinned to a pour makes a dressing in two minutes. Peanut butter with the same three basics makes a satay sauce. A thicker version drizzles over grains; a thinner one works as a marinade.
For a richer sauce that pours over roasted vegetables, a cashew cheese sauce comes together in a blender with no cooking at all.
Then make two add-ons that store well. Seeds like pumpkin, sunflower, or hemp go in a small jar and sprinkle on any day. Sauerkraut, kimchi, or quick-pickled onions live in a jar in the fridge and add the sharp note that keeps day four from tasting flat. Fresh items like avocado and torn greens get added at lunchtime, not on Sunday.
Step 5: Assemble Lunches That Travel Well
Assembly order decides whether lunch survives the commute. Build it in layers, dry to wet: grains first, then protein, then vegetables, then sauces, and crunchy or fresh items on top. Dressing goes in a separate jar until you’re about to eat, which is the whole fix for a soggy lunch.
Two minutes at the desk beats assembly on Sunday. The container holds the base, the jar holds the sauce, and you pour, squeeze an avocado half, or scatter a handful of seeds.
That system flexes across schedules. Long day away from a fridge? Take the cold version with no perishable toppings, and it packs fine in a bag with an ice pack. Short break at a desk? The thermos version needs nothing but a fork. Two lunches a week at a home setup? Cook the same base fresh and eat it right away, which is the cheapest variety available.
Step 6: Store, Chill, and Pack Safely
Cool cooked food in shallow containers so heat leaves fast, then cover and refrigerate within two hours. Keep everything at 40°F or below. USDA guidance treats leftovers as safe for three to four days in the refrigerator, so plan to eat days one through four from the fridge and treat Friday’s lunch as a freezer item.
Transport with an ice pack if the lunch sits unrefrigerated for more than two hours, which includes a long commute plus a long morning. Reheat until steaming hot all the way through, and reheat only what you’ll eat.
Freezing works well for soups, curries, chili, and cooked grains kept apart from dressing and raw vegetables. Freeze in portions you’ll eat in one sitting, let them sit on the counter briefly before transferring to the fridge, and use within two to three months. Thaw overnight in the fridge or warm gently on the stove with a splash of liquid.
Common Mistakes
Soggy salads by day three. Too much dressing in the container, or greens packed deep and damp. Fix it by storing dressing separately, using a wide shallow box, and choosing kale, cabbage, or broccoli over spinach and lettuce for anything that has to survive past Tuesday.
Dried-out rice and quinoa. Grains reabsorb the moisture from vegetables and sauces, then get lonely on their own. Fix it by storing grains with a damp paper towel, or adding a small splash of sauce into the grain compartment at packing time.
Flat flavor by Thursday. The food did not spoil, it just got boring. Fix it with acid. A fresh squeeze of lemon or a jar of pickled onions at lunchtime does more than another pinch of salt, and rotating two sauces instead of one is usually the real answer.
Crunch that disappears. Roasted chickpeas and nuts soften in a humid container overnight. Fix it by storing them separately and adding them last, or use them only on day one. The same goes for tortilla chips in a wrap, which is why a wrap keeps about two days rather than five.
Cooling food too slowly. A deep, uncovered pot on the counter stays in the danger zone far too long. Fix it by spreading food into shallow containers early, covering once cool, and always refrigerating within two hours.
Too many recipes at once. Four new dishes in one session turns prep into a project, and the week after is a takeout week. Fix it by running two base meals on repeat for a few weeks before adding anything new.
Skimpy protein portions. A grain bowl built mostly from rice at lunch tends not to carry you to dinner. Fix it by weighing protein separately and aiming for a proper palm-sized portion of beans, lentils, or tofu in each container.
Reheating the wrong things. Microwaved tofu gets rubbery and reheated salad dressing turns bitter. Fix it by baking tofu instead of frying it, adding dressing after reheating, and keeping greens out of the microwave entirely.
Frequently Asked Questions
How long do vegan meal prep lunches last in the fridge?
Most cooked vegan lunches keep three to four days refrigerated at 40°F or below, which is the USDA window for leftovers. Plan to eat containers in order, oldest first, and cook a fresh batch midweek if you want Friday covered. Cooked grains, beans, and roasted vegetables hold better than raw salads or anything with fresh avocado, which should be added at lunchtime.
Can you freeze vegan meal prep for the work week?
Yes, and soups, curries, chili, and cooked grains freeze better than assembled salads. Freeze grains and sauces in separate portions so the greens stay crisp, leave headspace in the container, and use within two to three months. Thaw overnight in the refrigerator rather than on the counter, and add raw toppings and dressing after thawing.
What can I eat for lunch at work with no microwave?
Plan cold-friendly meals that need no reheating at all: grain bowls eaten with a fork, lentil or chickpea salads with dressing on the side, hummus and vegetable wraps, overnight oats with chia, and fruit with nuts. A preheated stainless steel thermos solves the hot side, holding soup or curry hot through a morning and a commute.
How do I keep meal prep from getting soggy or bland by Thursday?
Store dressing and sauces in separate jars, keep grains away from wetter vegetables, and add crunchy items last. For flavor, keep two sauces in rotation rather than one, and finish each lunch with something sharp: lemon juice, pickled onions, sauerkraut, or a few fresh herbs. Acid at lunchtime does more than extra salt.
Can I meal prep 7 days at once instead of 5?
You can cook for seven, but only if part of the batch goes straight into the freezer. Refrigerated cooked food is safe for three to four days, so day five through seven would sit past that window. A middle path many people like is prepping five days and freezing two portions of soup or curry for the end of the week.
What containers stop vegan lunches from leaking in a work bag?
Snap-lid containers with gasket seals are the most reliable for soups and dressings, and glass jars with screw lids work well when kept upright in a padded pocket. Keep sauces in small narrow jars so a leak stays small, choose a wide shallow box for salads so greens are not crushed, and test any new lid at home with a spoon of water overnight.
Conclusion
Start smaller than feels satisfying. Pick two base meals you already eat on repeat, cook one grain and one legume in a big batch, roast one sheet pan of vegetables, and mix one sauce on Sunday. Portion five containers, refrigerate four, freeze one, and eat the fifth during the week.
Once that routine feels automatic, add variety at the assembly stage rather than the cooking stage. Swapping proteins, rotating a second sauce, and keeping pickled onions in the jar does more for a satisfying lunch than a new recipe does. That is how meal prepping vegan lunches for work becomes a habit instead of another chore on your list.