
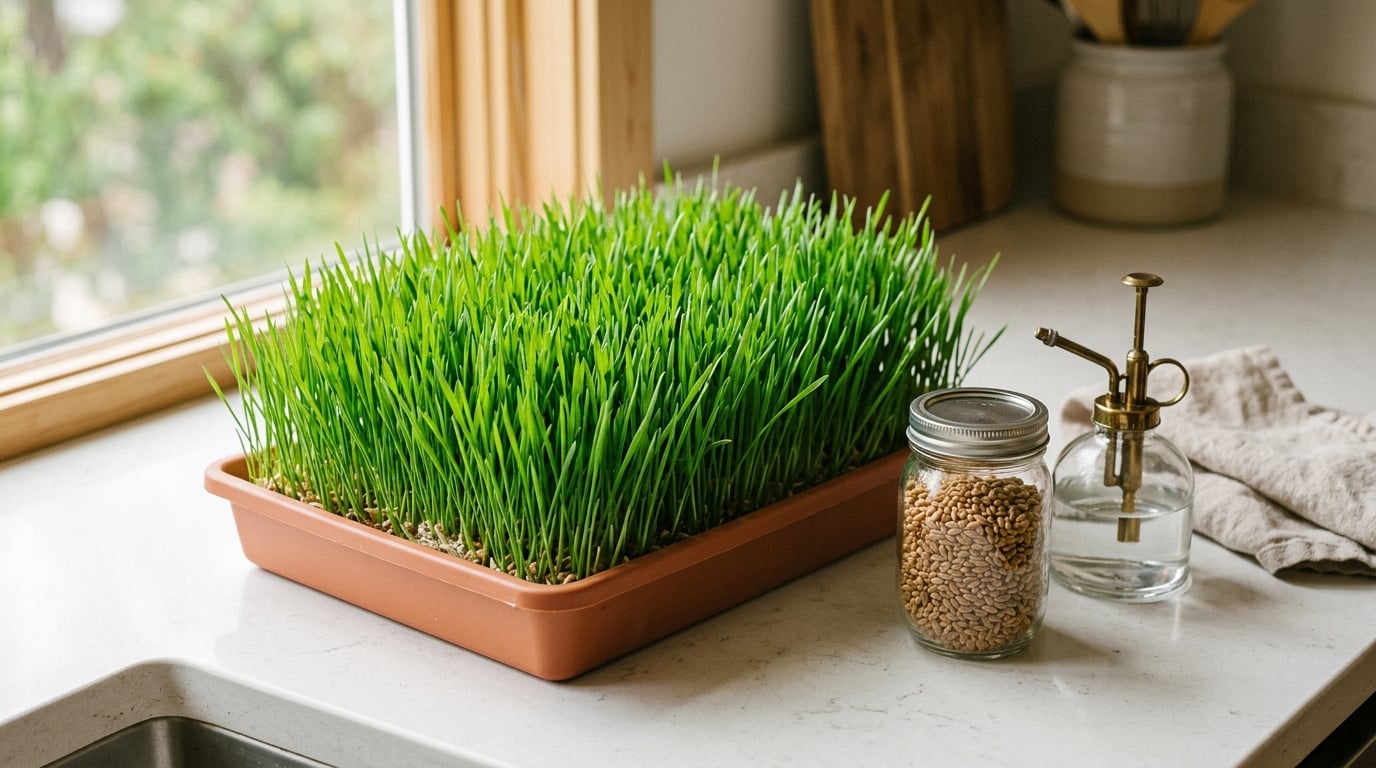
Wheatgrass is the young grass of the same plant you eat as bread (Triticum aestivum), cut at 6 to 8 inches tall long before it ever forms a grain head. If you have wondered how to grow wheatgrass at home in a tray, the short version is this: sow an even layer of soaked seed on a damp medium in a shallow tray, keep it dark and misted for about three days, then move it into bright indirect light until the blades reach cutting height. A crop takes roughly 7 to 14 days depending on seed variety, temperature, and how much light you give it. It is a beginner-level project, and almost every failure traces back to three things: soggy medium, no airflow, or a covered tray left on far too long. This guide walks through the whole cycle, day by day, including what a healthy tray looks like at each stage and what to do when things go sideways.
I have killed more trays than I care to admit, mostly with kindness rather than neglect, so the troubleshooting below is written from the losing side as much as the winning one. Updated for 2026.
Table of Contents
How to Grow Wheatgrass at Home in a Tray: What You Need
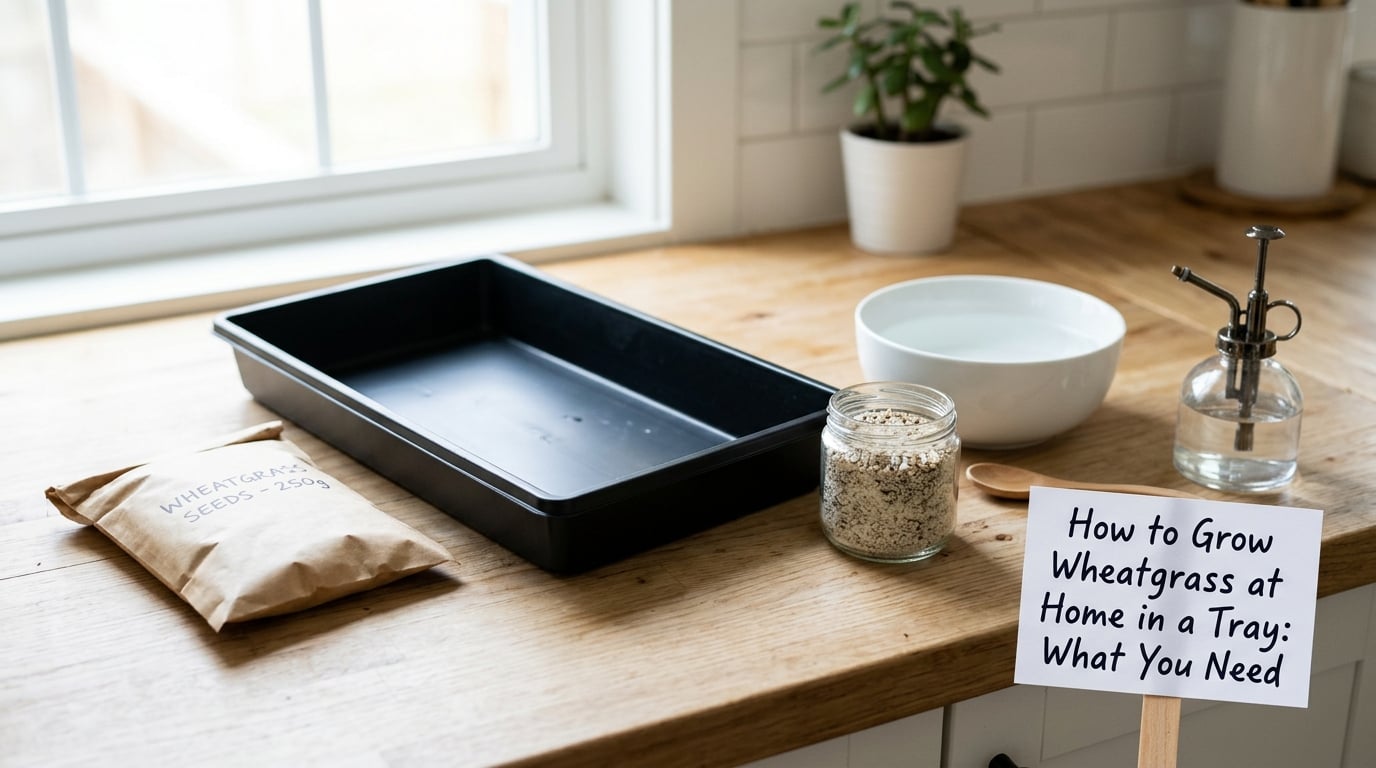
Six things cover the whole method, and five of them are kitchen drawer items.
- A shallow tray with drainage. A standard 10×20 nursery tray works well. If your tray has no holes, poke a dozen holes in the base with a screwdriver or hot skewer. You want free drainage, because a tray that holds standing water turns sour within a day or two.
- A second tray or plate to sit underneath. This catches the runoff when you bottom-water and lets you pour excess away.
- Wheatgrass seed, or hard red winter wheat berries. Ordinary grocery wheat often germinates unevenly or not at all. Buy seed sold for wheatgrass or cat grass, and use fresh seed from the current or previous season.
- A light growing medium. Clean potting mix or seed-starting mix works. A coir mat or a thick paper towel layer works too if you want to skip soil entirely.
- Filtered or room-temperature water in a hand mister. A fine spray is easier to control than a watering can at the seedling stage.
- A bright window or a grow light. A south- or east-facing sill is fine. Most growers also keep a small grow light as backup for a dark kitchen.
One rule governs the whole setup: the medium should be consistently moist, never waterlogged. Squeeze a handful before you sow. If water drips out, mix in more dry medium. If it barely holds together, add a little water and mix again.
Most people manage the entire tray on a kitchen counter. No outdoor space, no balcony, no grow room.
Step-by-Step
A typical tray runs 7 to 14 days from sowing to harvest. The stages below follow that window, and each one includes the visible sign that tells you it is going right.
Prepare the Tray and Growing Medium
Wash the tray with hot water and dish soap, rinse it, and let it dry. Scrub away any residue from a previous batch, because leftover organic matter is where mold starts.
Spread 1 to 2 inches of moistened medium across the bottom and pat it flat with the back of your hand. Level matters more than people expect: a sloped tray holds water in one corner and dries out in another, and you will get a thick patch on one side and bare medium on the other. Set the tray on your counter and look at it from the side. If the medium is level, you are done.
How to Grow Wheatgrass at Home in a Tray: Sow the Seeds
Measure about a third of a cup of seed for a 10×20 tray. Some growers go heavier for a thicker mat, but crowding is the main reason trays develop mold, so start at that rate and adjust from there.
Soaking is optional but speeds things up. Cover the seed with cool water for 8 to 12 hours, then drain it thoroughly in a colander. Skip the soak if your seed is already sprouted, or if you would rather get straight to the tray.
Scatter the seed as evenly as you can, working section by section rather than dumping the whole cup in one spot. Press it down gently so every kernel makes contact with the medium, then mist it so the surface is dark with moisture. Burying is not a thing here. Seeds sit on top or barely below the surface, and pushing them down just makes them rot.
Now the step beginners skip. Invert a clear tray over the top, prop it slightly so air can still move, or tent the seeded tray with a clear dome. Darkness and humidity get the seed moving; a sealed plastic box with no air hole gives you mold instead. Leave that cover on for about three days.
Water Without Causing Mold
Check the tray daily, but only water when the surface looks pale and dry rather than dark and damp. Misting from the top is the standard method: a few passes until the medium darkens, no puddles forming in the corners.
Bottom-watering is easier once the cover is off and the root mat has formed. Pour a shallow layer of water into the tray underneath, wait 20 to 30 minutes for the mat to drink, then tip off anything that has not been absorbed. Every morning, every evening. That is the entire commitment.
Two signals tell you moisture is about right. The medium should look uniformly dark and never show a pale dry patch or a glossy wet one. Lift a corner of the mat with a fingertip and check: cool and damp, with white root hairs underneath, means you are in the right zone.
If the surface dries out between waterings, add a clear dome back for a few hours a day, or move the tray away from a dry radiator. If the medium stays wet for days or starts smelling sour, you are watering too much. Remove the cover, spread the seed out more thinly next time, and pour off anything sitting in the bottom tray.
Place the Tray in Bright Light and Watch Growth
When shoots reach about an inch, around day three to five, take the cover off and move the tray to bright indirect light. Out of direct sun, growth slows down and the blades tip over.
Watch the change happen. Pale shoots straighten and turn green over about 48 hours. Blades separate, thicken and reach toward the window, and a white felt of roots knits the mat together underneath. That mat is the reason a soilless tray works at all: the roots hold the seed layer in place like a tiny raft.
Rotate the tray a quarter turn every day or two so the growth stays even and straight. If a windowsill is all you have, lean the tray slightly toward the light rather than laying it flat. A grow light positioned 6 to 8 inches above the blades, on for 12 to 14 hours a day, makes the difference between a healthy 8-inch crop and a pale, leggy 4-inch one.
Keep the room between roughly 60 and 75°F (16 to 24°C). Heat is fine on its own, but heat and stagnant air together is what causes trouble, so run a fan nearby or open a door if the tray is in a closed cupboard.
Harvest Wheatgrass at the Right Height
Cut when the grass reaches 6 to 8 inches and you can count several true leaves. The blades should stand upright and feel firm between your fingers. Pale, bending-over grass means the crop stalled, usually from too little light, and cutting it early gives you a thinner harvest than waiting.
Use clean, sharp scissors. Slide the blades into a loose handful, cut 1 to 2 inches above the crown, and take as much as you need for your smoothies. Never cut flush with the medium. You would be cutting off the growing point, and that tray is finished.
For smoothies, a couple of ounces of blades per glass is plenty. The flavor is grassy and slightly sweet, so it disappears into fruit, which is the easiest way to start drinking it.
Regrowth is possible but modest. Keep watering the tray after a cut and the stubs usually send up new blades within a week, though the second cut comes in thinner and shorter. Most growers get one good harvest and then re-sow, and the old root mat goes into the compost.
Rinse, Store, and Use the Harvest
Rinse the cut grass under cool running water and shake it dry. Run your fingers through the pile to pull out grit, husks and any loose root fibers, which are the main complaint people have about home-grown wheatgrass in a smoothie.
Dry it well. A salad spinner works, and a roll in a clean towel for a few minutes gets the blades damp rather than dripping. Wet grass stored in a sealed container goes slimy fast.
Refrigerate loosely wrapped in a clean towel or paper towel inside a partly open container or bag, and use it within several days. Discard anything slimy, discolored, moldy or off-smelling rather than cutting around the bad parts. If you cannot get to it in a few days, compost it.
Wheatgrass is a food, not a treatment. It is a green vegetable juice, and the honest case for it is that it adds a concentrated vegetable to a drink. If you have celiac disease or a wheat allergy, skip it entirely, since wheatgrass is the same species as wheat. People on blood-thinning medication, or with a history of kidney stones, should check with a doctor or registered dietitian before making it a habit. Anyone else who wants a daily greens habit, and is not sure whether one is right for them, should ask the same person.
Common Mistakes
- Poor germination. The tray sits in dry patches or the seed was three years old. Use fresh seed, press it into the medium properly, and keep the cover on for the full three days.
- Waterlogged medium. Standing water, a sealed cover, or a heavy soil mix all starve the seed of air and produce a sour smell. Add drainage holes, water less, and leave the tray uncovered once shoots appear.
- Cover left on too long. Pale, stretched, weak shoots that collapse. Take the cover off as soon as the blades are about an inch tall, no later.
- Not enough light. Yellow, leggy blades that never reach height. Move to a brighter sill or add a grow light 6 to 8 inches above the tray.
- Uneven sowing. Bare corners and dense clumps. Spread the seed in sections, mist to settle it, and do not let the medium dry out during the first three days.
- Cutting too short. Slow or absent regrowth after harvest. Leave 1 to 2 inches of stubble above the crown.
A few habits that keep a tray healthy. Sanitize the tray between batches with a 1:10 bleach solution, and label the tray with the sowing date so you know how long it was covered for. Aim for a tray that is covered but not crowded, because airflow is what separates good trays from sour ones.
On the white fuzz question, because it comes up more than any other: in a home tray it is usually root hair, not mold. Root hair is a fine, uniform white fuzz that follows the roots, disappears or lies flat when you mist the surface, and smells like nothing. Mold is patchier and fluffier, sits on the surface and the blade tips rather than the roots, and often comes with a sour or musty smell. Mold spreads on its own and returns after a wipe. When in doubt, change the airflow before you discard a tray, and if the smell is there, compost it.
Frequently Asked Questions
How long does wheatgrass take to grow in a tray?
Plan on 7 to 14 days from sowing to harvest. Germination usually shows within two to three days, shoots clear the cover around day three to five, and the grass is ready at 6 to 8 inches tall in the second week. Seed variety, room temperature and light all move the timeline, so a dim kitchen can add several days at the end.
Can I grow wheatgrass indoors without soil?
Yes. A coir mat, a rockwool or Oasis pad, or a thick layer of paper towel in a shallow tray all work. The seed roots into whatever medium you use and forms a mat that holds itself together, which is why the soilless method works at all. Bottom-water once the mat forms, and keep air moving around the tray.
Why is my wheatgrass growing moldy?
Mold almost always comes from too much moisture, too little air, or a crowded tray. Standing water in the bottom tray, a sealed cover left past day three, or heavy seed density all create the conditions. Remove the cover, pour off excess water, increase airflow, and thin the seed density next time. Discard any tray that smells sour.
How tall should wheatgrass be before I harvest it?
Six to 8 inches, with several true leaves and blades that stand upright and feel firm. Grass that is pale and bending over has stalled, usually from too little light, and a cut harvest will be thin. Use clean scissors and cut 1 to 2 inches above the crown, never flush with the medium, so the tray can regrow a smaller second cut.
What is the best way to use freshly grown wheatgrass in smoothies?
Rinse the cut blades under cool water, pull out any root fibers or husks with your fingers, and dry them well. Start with one or two ounces per 12-ounce glass, blended with sweet fruit like banana, mango or pineapple, which covers the grassy taste. Use it within several days of harvesting, and toss anything slimy or off-smelling.
Conclusion
Start with the tray. Wash it, add drainage holes if it lacks them, and level out 1 to 2 inches of damp medium.
Then sow an even layer of fresh seed, press it in, mist it, and cover it for about three days. Keep the medium evenly moist and never sitting in water, and move the tray into bright indirect light as soon as the shoots are about an inch tall.
When the blades reach 6 to 8 inches, cut above the crown with clean scissors, rinse the harvest well, and use it within a few days. If a tray smells sour or looks slimy, compost it and start fresh, because a moldy tray is not worth saving.