
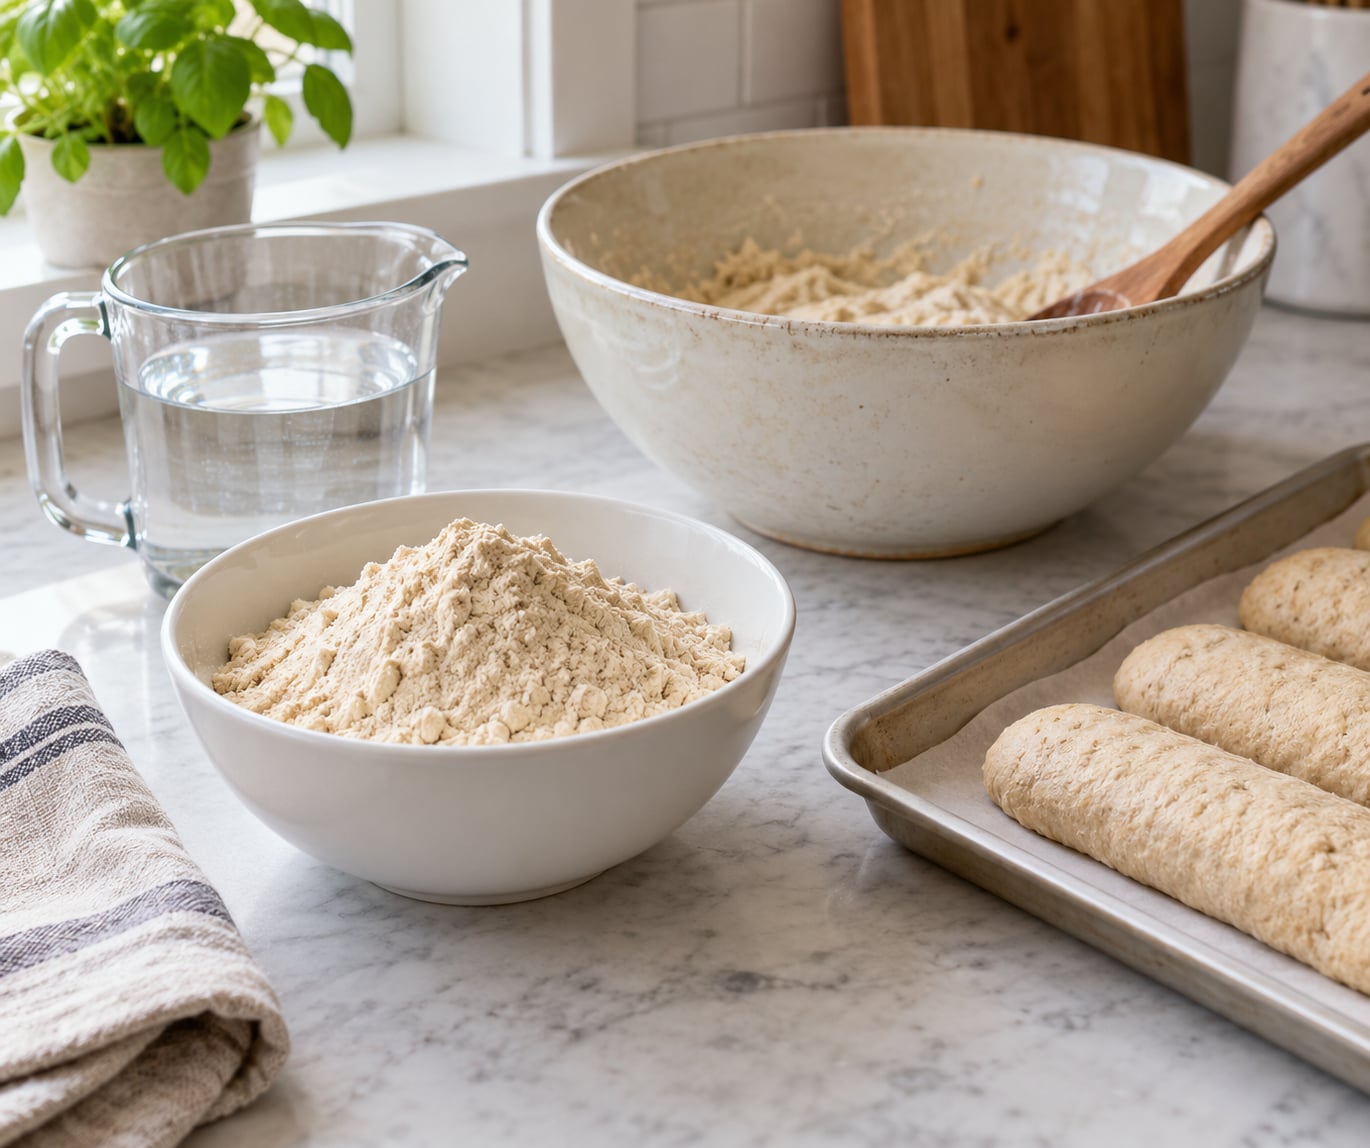
Making seitan from vital wheat gluten is mostly a hydration exercise. Mix the flour with water, knead it briefly until the gluten develops into a spongy mass, wrap it tight, and simmer it at a bare bubble for 45 to 60 minutes. The result is a dense, chewy log with a fibrous, meat-like bite that slices cleanly once chilled.
The whole thing takes about 20 minutes of active work and an hour of mostly-ignored cooking time. Difficulty is genuinely low. The only thing that trips people up is getting the flour-to-liquid ratio right, so let’s start there.
Table of Contents
- What You Need
- Step-by-Step: How to Make Seitan from Vital Wheat Gluten
- Common Mistakes and How to Fix Them
- Tips for Better Seitan Every Time
- How to Cook and Serve Homemade Seitan
- Frequently Asked Questions
- Can I make seitan using vital wheat gluten and water only?
- Why is my vital wheat gluten dough dry, crumbly, or breaking apart?
- Do I need to bake seitan made from vital wheat gluten?
- How long should I cook homemade seitan?
- How do I keep cooked seitan from becoming rubbery?
- How long does cooked seitan last, and can I freeze it?
- Conclusion
What You Need

You need vital wheat gluten, water, and very little else. The flour is pure dried wheat protein with the starches washed out, and it cannot become seitan on its own — it has to be hydrated before heat sets the protein network.
A kitchen scale is the single most useful tool here. Cups drift away from the ratio because flour density varies by brand, and that drift is the root of most rubbery batches. If you have no scale, volume measures still work, just expect to add water in small increments and judge by feel.
Dry ingredients
- 150 g (about 1.5 cups) vital wheat gluten
- 1 teaspoon fine salt
- 2 tablespoons nutritional yeast
- 1 teaspoon garlic powder
- 1 teaspoon onion powder
- 1 teaspoon smoked paprika
- 2 tablespoons olive oil, optional
Wet ingredients
- 100 ml (about 3/4 cup plus 1 tablespoon) water
- 2 tablespoons tamari or soy sauce
- 1 tablespoon miso, optional
- 1 teaspoon apple cider vinegar, optional
Tools
You want a large mixing bowl, a wooden spoon or sturdy whisk, cooking twine or a silicone mold, a stockpot that holds the log flat, and a deep skillet or steamer basket for the steam method. A food processor works too, and it is faster than hand mixing when you are doubling the batch.
Two optional additions earn their place. Chickpea flour softens chew and mellows the wheat note, at the cost of a slightly gummy edge if you overdo it. Tomato paste adds body and umami, but double concentrate overwhelms everything at more than a tablespoon, so halve it or skip it.
Step-by-Step: How to Make Seitan from Vital Wheat Gluten
The complete method takes 20 minutes of active time plus roughly 60 minutes of cooking and an optional 8-hour chill. One batch yields roughly 400 g, which is eight to ten servings depending on how thick you slice it. Difficulty is easy for a first attempt if you weigh the flour.
Step 1: Mix the Dry Ingredients
Put the vital wheat gluten in your bowl first, then add the salt, seasonings, and nutritional yeast on top. Whisk or fork everything together for about 30 seconds.
The point of whisking is to break up concentrated pockets of salt and yeast, which otherwise hit the dough as one salty or savory lump. If you are adding chickpea flour, mix it in now so it distributes evenly through the flour rather than sitting in pockets that hydrate unevenly. Weigh the gluten rather than scooping it — that is the whole ratio.
| Batch | Vital wheat gluten | Water (plus tamari) |
|---|---|---|
| 1x | 150 g (1.5 cups) | 100 ml (about 3/4 cup) |
| 2x | 300 g (3 cups) | 200 ml (1.5 cups) |
| 3x | 450 g (4.5 cups) | 300 ml (2.25 cups) |
That 3 parts gluten to 2 parts water by weight is the number worth memorizing. Everything else is adjustment, and the tamari counts as seasoning on top of it rather than part of the hydration.
Step 2: Add the Wet Ingredients and Form the Dough
Pour the water and tamari over the dry ingredients and stir with a spoon until no dry flour is left at the bottom. It will look ragged and slightly glued together, which is normal at this stage.
Now knead it. Push the mass away with your palms, fold it back, rotate, and repeat for two to three minutes. During those first minutes you are hydrating two proteins, gliadin and glutenin, which link into an elastic network. Before that network forms, the dough tears. After it forms, the mass stretches and springs back without cracking.
The visual cue is the sponge test. A properly developed dough has visible open pores when you tear it, similar to a bread dough that has been kneaded a bit too long. Stop when you see that. Overworking past this point is one of the main causes of dense, rubbery seitan.
Step 3: Rest and Check the Texture
Cover the bowl with a damp towel and leave it for 5 to 10 minutes. Resting lets the gluten relax and takes the edge off the elasticity, which makes shaping far easier.
Then run a quick texture check. Pinch a small piece and pull it gently — it should stretch into a thin film without snapping, similar to windowpane dough. If it crumbles into dry crumbs, you need more liquid. If it stretches indefinitely and feels like slime, you need more flour.
- Dough crumbles at the edges: add water one tablespoon at a time and knead again.
- Dough is slack and sticky, sticks to everything: add a tablespoon or two of extra vital wheat gluten.
- Dough tears instead of stretching: knead two more minutes. Undeveloped gluten is the usual cause.
- Dough feels dense and heavy immediately: it was underhydrated at mixing. Add liquid and rest again.
Step 4: Shape the Seitan
Divide the dough into portions and roll each one into a log about 15 cm long and 3 cm wide. Smaller logs cook faster and stay more tender. A big log takes longer in the middle and often leaves you with a tough core.
Press firmly as you roll to push out air pockets, because trapped steam causes uneven cooking and splits. Seal the ends of each log by pinching them closed, then wrap tightly — two layers of foil twisted at the seams, or parchment paper pressed into a mold and tied with twine, or a reusable silicone loaf pan lid.
The wrap has to be tight. Loose wrapping lets water seep in and gives you a waterlogged exterior. It also matters what the wrap touches: direct foil contact can leave a metallic note that a few people find so unpleasant they throw the batch out, so parchment between the dough and the foil is the safe default.
Shape determines the cooking method. Thick logs are built for simmering. Flat strips and thin cutlets pan-fry quickly. Rope shapes work for stir-frying because they hold their form in a hot pan. Flat, thin pieces also survive oven baking, though they dry out faster.
Step 5: Cook Until Tender and Chewy
Simmering is the most reliable method. Put the wrapped logs in a stockpot, add water or broth to come about halfway up, and bring the liquid to a bare simmer — around 180 to 190°F (82 to 88°C).
A rolling boil is the enemy here. Violent water movement tightens the outer proteins into a shell while the center stays undercooked, and that shell is exactly what people describe as rubbery. Hold the temperature steady and add more hot water if the level drops too far.
Cook a 3 cm log for 45 to 60 minutes. Check by piercing the center with a thermometer, or by sliding a chopstick through — it should pass through without much resistance. Test one piece early because brands absorb differently, and the same flour that needed 45 minutes last week may need 60 this week.
| Method | Time | Temperature | Resulting texture |
|---|---|---|---|
| Simmer in liquid | 45-60 min | Bare simmer, 180-190F | Densest chew, deepest flavor |
| Steam in a basket | 30-45 min | Full steam, 212F | Lighter, springier bite |
| Bake in the oven | 60-75 min | 350F | Firmest, driest texture |
| Pressure cook on steam setting | About 60 min | 212F | Even, quick texture |
Baking works if the wrapped log sits on a tray rather than touching the element, and the log is small. Steam is the safer route for larger logs. Neither steaming nor baking replaces simmering in flavor — the cooking liquid is where the seasoning goes, which is why seasoned broth beats plain water for a first batch.
Cooked seitan is cooked wheat protein rather than meat, so it carries no USDA minimum internal temperature of its own. The 165°F (74°C) guideline applies when you reheat a cooked piece later: bring it to that temperature and serve it piping hot.
Step 6: Cool, Slice, and Store
Turn off the heat and let the seitan cool in its cooking liquid, uncovered, for at least 30 minutes. Unwrapping while it is hot and wet traps steam and makes the outside soggy.
Many cooks then refrigerate the wrapped log for 8 hours before slicing. That chill firms up the crumb so slices hold together, and it finishes setting the interior the way a dense bread does. You can eat it before the chill, but it slices raggedly and the texture is still settling.
Once cool, wrap it and refrigerate. Cooked seitan keeps about 4 to 5 days cold. If you want it softer, slice before storing and let the slices sit in a little cooking liquid; if you want clean slices for sandwiches, store the whole log and cut to order.
Freezing cooked seitan works fine. Slice it, lay the slices flat on a tray to freeze individually, then bag them so they do not clump. For reheating, pan-fry from frozen in a hot skillet with a little oil until crisp on both sides. Cook first, then freeze — raw dough does not freeze or knead back into anything usable.
Texture after chilling is firmer than right out of the pot. That is normal, not a mistake, and a short fry in the pan usually brings back the chew people expect.
Common Mistakes and How to Fix Them
Almost every disappointing batch traces back to one of a handful of causes. Find the symptom, match it to the reason, and adjust the next batch rather than patching the finished seitan.
| Symptom | Likely cause | Fix |
|---|---|---|
| Dough cracked or broke apart while kneading | Not enough liquid, or gluten never developed | Add water a tablespoon at a time and knead two more minutes |
| Dough stuck to the bowl and hands | Too much liquid for that brand’s flour | Add extra vital wheat gluten a tablespoon at a time |
| Seitan is dense or chewy like a tire | Overworked dough, or cooked at a rolling boil | Knead only 2-3 minutes and hold a bare simmer |
| Outside done, center still raw | Log too large, or simmer rushed | Use smaller logs and give a 3 cm log the full 45-60 minutes |
| Exterior soggy after cooking | Wrapped too loosely, or unwrapped while hot | Wrap tight, cool uncovered in the pot for 30 minutes |
| Flavor washed out | Plain water, or unseasoned broth, or sliced too early | Cook in seasoned broth and chill before slicing |
| Metallic taste | Dough sat directly against foil | Put parchment between the dough and the foil next time |
| Strong lingering wheat flavor | Not enough acid or seasoning to balance it | Add a teaspoon of vinegar or a tablespoon of miso |
Tips for Better Seitan Every Time
Weigh the gluten, every time. This is the single change that fixes more batches than anything else, because it makes the 3:2 ratio real instead of approximate.
Hold back about 15 ml of your water and add it only if the dough feels dry. Brands absorb differently, and a dry-running flour from one company can feel tacky from another on the same ratio.
Press the cooked surface with a spoon. If it dents without springing back, it needs more time. If it springs back and feels hard, it is done and further cooking only dries it out.
Change one thing at a time. Once your base recipe is right, swap seasonings or shaping on a single batch so you can tell what actually helped rather than guessing at three changes at once.
Try shapes you have not made before. A rope sliced thin and stir-fried behaves nothing like a loaf simmered whole, and both come from the same dough.
Season the cooking liquid as carefully as the dough. Broth with garlic, ginger, tamari, and a strip of kombu gives the seitan a savory depth that the dough alone cannot.
How to Cook and Serve Homemade Seitan
Sliced seitan is a blank canvas. Simmer slices in sauce for a few minutes, pan-sear them until browned for crisp edges, or toss them into a stir-fry with high heat so they char without going dry.
Soup, curry, and grain bowls take pieces straight from the pot. Deli-style cold slices come from the chilled log sliced thin, and they work well in sandwiches with mustard, hummus, or a pickled onion slaw.
The recipe produces raw seitan. Nothing is safe to eat until it has been fully cooked through, so do not taste the dough, and do not skip the cook because the smell seems familiar.
Seasoning ideas stay simple: smoked paprika and garlic for a barbecue style, curry powder with ginger for a stew, or Italian seasoning with tomato paste for a marinara version. If you build lots of bean and legume dishes, our guide to how to reduce gas from beans and lentils pairs well with seitan in chili and chili-adjacent bowls.
Frequently Asked Questions
Can I make seitan using vital wheat gluten and water only?
Yes. Vital wheat gluten and water make plain seitan, and the dough hydrates and develops on its own. Water-only seitan tastes more wheaty and blander, though, because seasoning and salt have to come from somewhere else. Add salt and spices to the dry mix, or cook the log in seasoned broth instead of plain water. Both approaches keep the 3:2 ratio of flour to water by weight.
Why is my vital wheat gluten dough dry, crumbly, or breaking apart?
Two causes cover almost every case: not enough liquid, or gluten that never developed. Measure by weight to rule out the first one, holding back a little water and adding it a tablespoon at a time. For the second, knead two more minutes until you see open pores when you tear the dough. If it still crumbles, your brand is unusually dry and needs a bit more water than the standard ratio.
Do I need to bake seitan made from vital wheat gluten?
No. Simmering or steaming is the standard method and gives the best texture. Baking works at 350F for 60 to 75 minutes, but it produces a drier, firmer result because the log loses moisture to the oven instead of absorbing it from liquid. Baked seitan also carries more risk of splitting if the log was rolled with air pockets or wrapped too loosely.
How long should I cook homemade seitan?
A 3 cm thick log needs 45 to 60 minutes at a bare simmer around 180 to 190F (82 to 88C). Smaller cutlets take 25 to 35 minutes, and steaming the same log takes 30 to 45 minutes. Test with a thermometer or a chopstick, and take the pot off the heat when the center is tender with no resistance rather than cooking to a fixed time alone.
How do I keep cooked seitan from becoming rubbery?
Rubbery texture comes from overworked dough, a rolling boil, or both. Knead only two to three minutes, stop as soon as the dough shows open pores, and hold the liquid at a gentle simmer where you can still see the pot bottom. Boiling water seizes the outer proteins into a tough shell while the center finishes cooking, which is what makes the whole log tough.
How long does cooked seitan last, and can I freeze it?
Cooked seitan keeps about 4 to 5 days in the refrigerator when wrapped properly. For freezing, cook the seitan first, slice it, freeze the slices flat on a tray, then bag them so they do not stick together. Raw dough does not freeze well, so skip that step. Pan-fry frozen slices in a hot skillet until crisp on both sides to bring the texture back.
Conclusion
The whole method reduces to four things: weigh your flour, hold the water at 3 parts gluten to 2 parts water by weight, knead only until the dough shows pores, and simmer at a bare bubble for 45 to 60 minutes.
Start with the base recipe in this guide and get a plain log right before you start flavoring. Once the texture behaves, the seasoning is the easy part — and you will know exactly which change fixed which problem.