
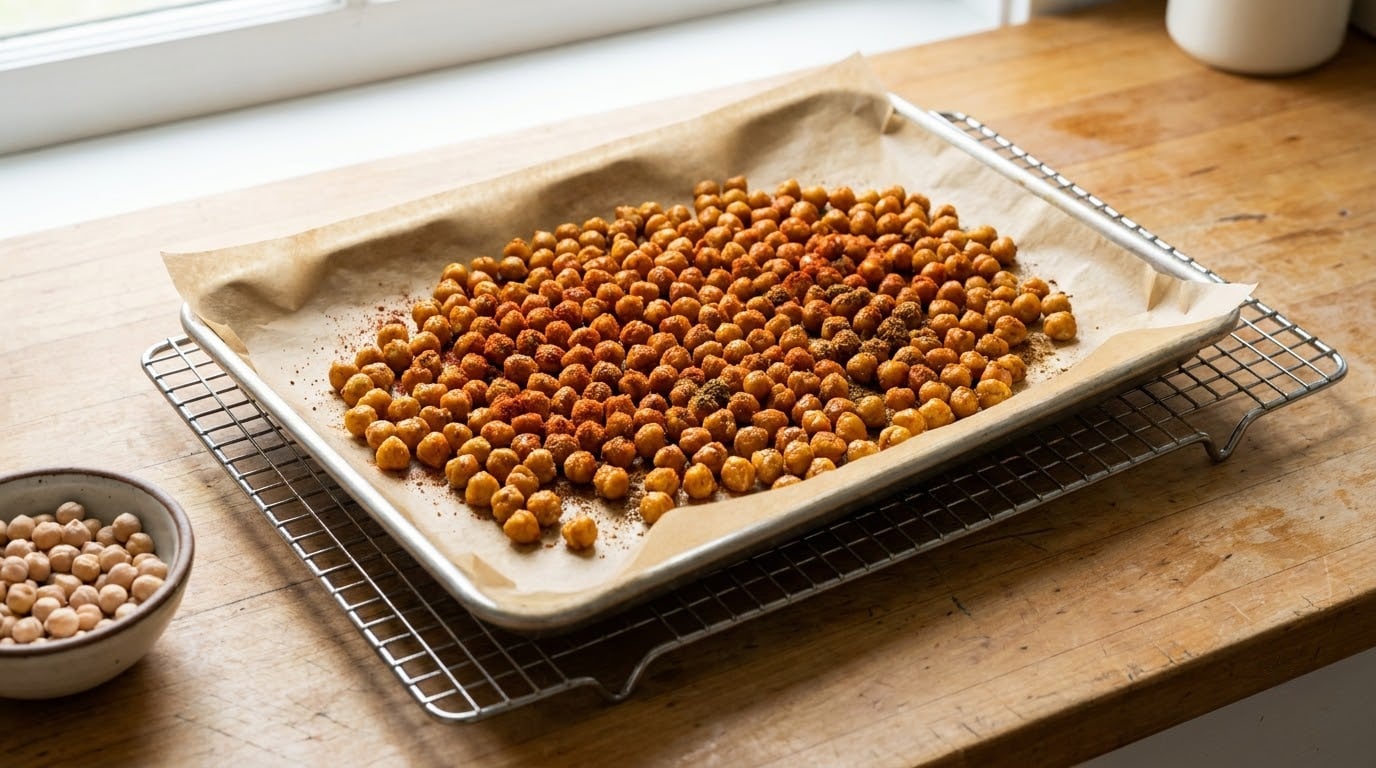
The trick to how to roast chickpeas so they get crispy is a two-stage roast at 400F. First you roast the bare, dried chickpeas for 20 to 25 minutes to drive off trapped moisture, then you toss them with a little oil and salt and roast them again for 15 to 20 minutes until deep golden. Cooling them completely on the pan finishes the crunch. Total hands-on time is about 15 minutes, and the whole thing runs 35 to 45 minutes in the oven.
That two-stage method matters because moisture is the enemy of crunch. Boiled or canned chickpeas carry water inside the bean and on the skin, so a hot oven steams them instead of roasting them. Dry them out first and the oil clings, the skin blisters, and you get something that snaps instead of bends.
If your last batch came out chewy in the middle, it was almost certainly wet chickpeas, a crowded pan, or chickpeas sealed into a container while still warm. All three are easy to fix, and the steps below handle each one.
What You Need
You do not need anything unusual. A rimmed baking sheet, a bit of neutral oil, and salt are the whole list, plus any seasoning you like.
Ingredients
- 1 x 15 oz can chickpeas (garbanzo beans), or 1 cup dried chickpeas soaked overnight
- 1 to 2 tablespoons extra-virgin olive oil or avocado oil
- 1/2 teaspoon fine sea salt, plus more to taste after roasting
- Optional: 1 teaspoon smoked paprika, 1/2 teaspoon garlic powder, 1/4 teaspoon cumin, 1/4 teaspoon ground black pepper
Equipment
- A rimmed baking sheet, about 18 by 13 inches, so chickpeas can sit in a single layer
- Parchment paper or a silicone baking mat, which keeps the sugars on the beans from welding themselves to bare metal
- A cooling rack for the cooling step
- A convection oven is fine, though the temperature drops a little
Canned or Dried Chickpeas: Which Should You Use?
Both work, and the difference is mostly about time and how crisp the result gets.
- Canned chickpeas. About 5 minutes of prep. The texture comes out very good, with a slightly softer center. Best for weeknight snacking and lunchbox snacks.
- Dried chickpeas, soaked overnight. A 12 to 24 hour soak plus 20 to 30 minutes of simmering. The texture is the best crunch of the two, because the bean is the driest going into the oven. Best for batch cooking and for anyone chasing maximum crispness.
Canned chickpeas pick up water from the canning liquid, which is why they need a longer dry stage than fresh-cooked ones. Dried chickpeas, cooked only until tender, give the oven less water to remove and end up noticeably crunchier.
Step-by-Step
Heat the oven to 400F and set a rack in the middle. The middle rack gives the chickpeas the same heat from above and below, which is what you want for even drying.
1. Choose and Prepare the Chickpeas
For canned chickpeas, drain them in a colander, rinse under cold water, and spread them on a towel. For dried chickpeas, soak them in plenty of water for 12 to 24 hours, drain, then simmer in fresh unsalted water for 20 to 30 minutes until tender with a slight bite. Drain those too.
Do not season chickpeas that are still wet. Salt and oil on a damp surface just seal the moisture in, and the beans roast unevenly while staying chewy. Get them dry first, season second.
2. Dry the Chickpeas Until the Skins Wrinkle
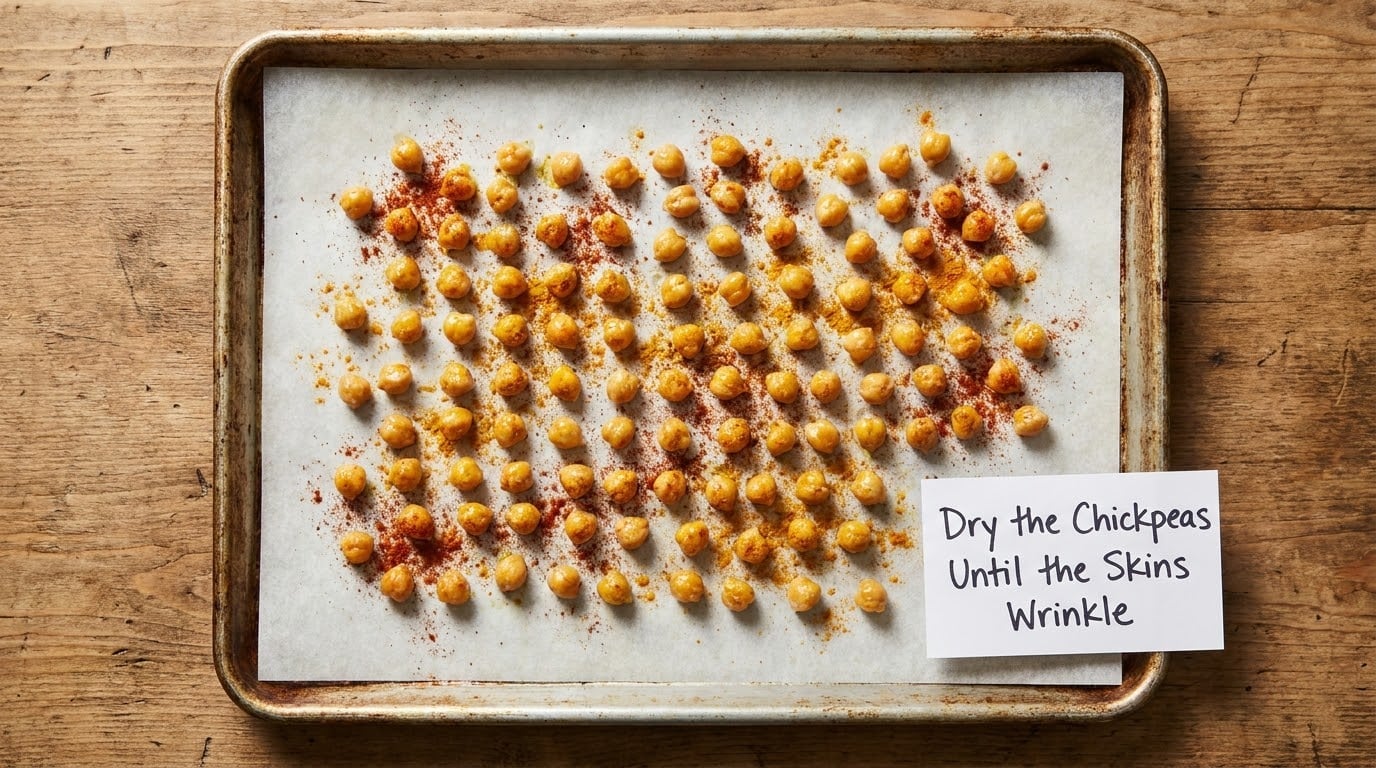
Pat the chickpeas dry with a clean towel, then roll them gently between your palms or in the towel. You are trying to loosen the surface water and rough up the skin. A second towel pass helps more than people expect.
Look for the signal: the skins go matte and slightly wrinkled, and the beans feel dry and chalky rather than slick. That usually takes 10 minutes of air drying on the counter for canned chickpeas.
If you want to skip waiting, put them on the baking sheet in a 200F oven with the door cracked for 10 to 15 minutes. This is the same low-heat dehydration step, and it is the single biggest upgrade you can make. Cooks on cooking forums describe it as the difference between chewy and genuinely crunchy.
3. Season for Maximum Crispness
Toss the dry chickpeas with 1 to 2 tablespoons of oil and the salt, then add your spices. Olive oil and avocado oil are both stable enough for this heat; a delicate extra-virgin oil can go on after roasting instead.
Keep the coating light. A heavy slick of oil browns and scorches before the inside dries out, and thick spice mixes such as jerk or curry blends often turn bitter on the pan before the beans crisp. If you plan to use one of those, add it after roasting.
Spread them in a single layer with a fingertip of space between each one. Touching beans steam each other, and that is the whole game.
4. Roast at High Heat Without Crowding
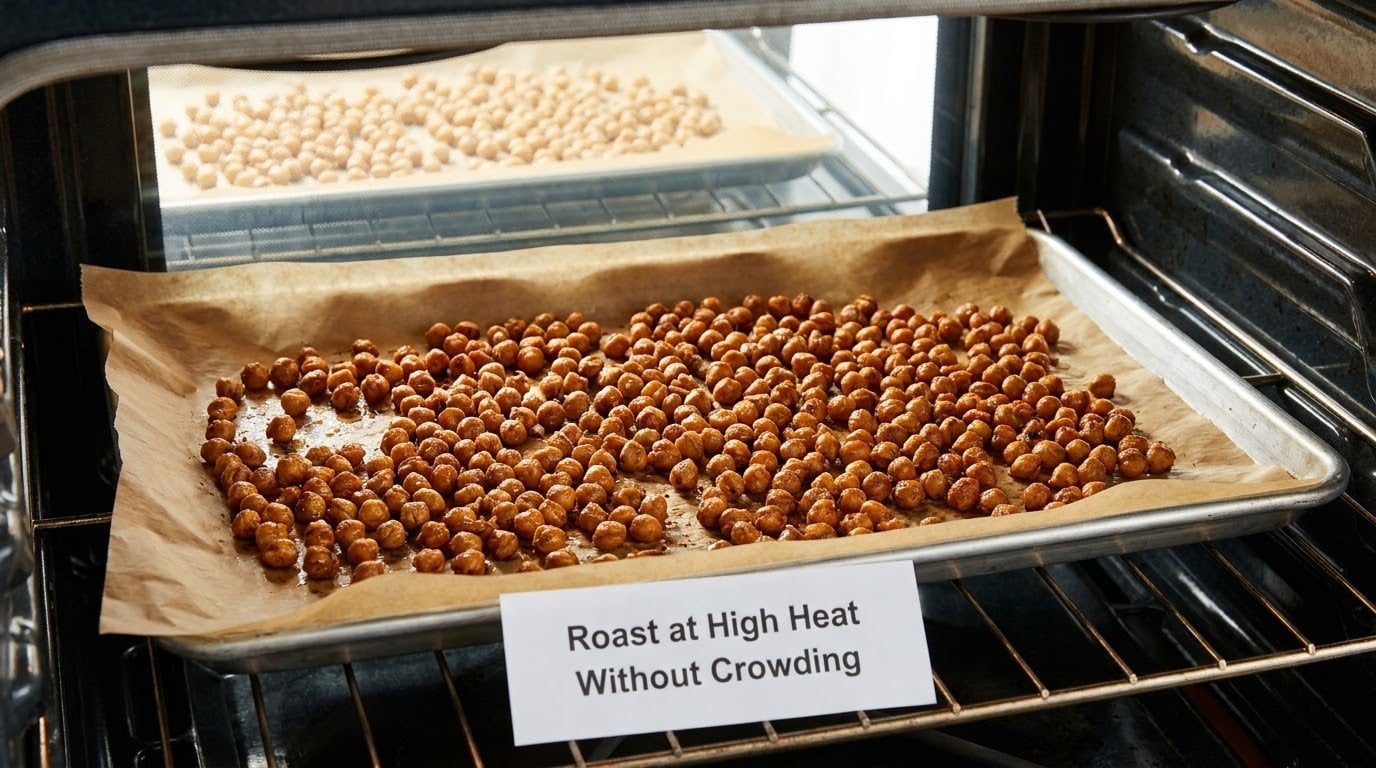
Roast at 400F for 20 to 25 minutes with no oil added yet if you skipped the counter-drying stage, or for 15 to 20 minutes after the extra drying step. Do not stir yet. Let the beans sit undisturbed so the skins can dry and start to blister.
At the halfway mark, pull the sheet out and shake it hard a few times, then tap the pan back onto the rack. Shaking keeps the underside from sitting in its own moisture, which is the second most common reason chickpeas turn out soft.
Return the pan and roast until the beans look dry, listen for a rattle when you shake the pan again, and edges have turned golden. Total time from a cold pan is usually 35 to 45 minutes.
For a convection oven, drop to 375F and start checking 5 minutes early. If you use an air fryer, dry roast at 350F for 15 to 18 minutes, shaking the basket twice, then toss with oil and salt and air fry 8 to 12 minutes more. Many home cooks find the air fryer beats the oven for crunch because the moving air dries the skins faster.
If the beans go from pale to dark fast, pull the tray lower in the oven or tent it loosely with foil. The ones closest to the element brown long before the rest dry out.
5. Check for a Golden, Dry, Crunchy Finish
Time alone is a poor test, because chickpea size, age and starting point all change the bake. Use these cues instead:
- The beans look noticeably smaller than they did before roasting
- Some have split open or burst at the seam
- Edges are deep golden, with a few darker flecks
- They roll freely across the pan instead of sitting in a sticky clump
- Shaking the pan makes a dry rattling sound, not a dull thud
Taste one. It should feel hard and hollow, not flexible. If the outside is dark but the center still gives, put the pan back for another 5 minutes and watch it closely.
6. Cool Completely for the Crispiest Texture
Leave the chickpeas on the pan out of the oven for 10 to 15 minutes, or move them to a wire rack for about 30 minutes. Residual heat finishes drying the centers, and the chickpeas continue to crisp as they cool. This is the step most recipes skip and readers most often ask about.
Season again at this point if you want more salt, or add a delicate spice or drizzle of oil now that nothing will burn it.
Store in a container that is closed but not airtight, or an open jar on the counter. Airtight is fine for the first hour while the chickpeas give off their last moisture; sealing them while warm traps condensation and softens the batch overnight. They hold their crunch for several days this way.
Common Mistakes
Most disappointing batches trace back to one of these five problems.
The Chickpeas Were Still Damp
The fix is more drying than most people expect. Pat them dry, roll them in a towel, then give them 10 to 15 minutes in a 200F oven before oil goes anywhere near them.
The Pan Was Overcrowded
Use one layer with space between the beans. If your sheet is too small, bake two trays instead of piling them up. Overlapping chickpeas steam and end up soft no matter how long you roast.
The Oven Was Too Cool
Low heat dries slowly and browns slowly. 400F is the sweet spot for a conventional oven, 375F for convection. A slow 300F bake mostly produces leathery beans rather than crisp ones.
You Left Them In Too Long
Once a chickpea is fully dry, extra oven time only burns the outside and hardens the center. Check by sound and by rolling, not by the clock.
They Were Stored While Warm
This is the number one complaint from home cooks about the day-after texture. Let them cool completely on the rack first, then close the container. If a batch has softened, spread it back on a hot sheet at 350F for 8 to 10 minutes and let it cool again.
Bonus Tips
- Do not peel the chickpeas. Peeling is extra work and it does not make them any crispier.
- For an oil-free version, brush with aquafaba, the liquid in the chickpea can, or a splash of vegetable broth instead of oil. You lose a little richness but keep the crunch.
- Sweet profiles work too: maple and cinnamon, or honey and smoked paprika. Add honey after roasting so it does not burn.
- Roast a double batch and keep the extras loosely covered on the counter. They are good on salads in place of croutons, scattered over grain bowls, on soup, or folded into trail mix.
One can of chickpeas gives you a snack that crunches like a chip with a decent hit of plant protein and fiber, which is why so many people make it a standing lunchbox staple. If fiber is new to your diet, work up to it gradually and drink water, since jumping in can cause gas and bloating.
Frequently Asked Questions
How do I roast chickpeas so they get crispy?
Dry them thoroughly, then roast in two stages at 400F. Bake the plain dried chickpeas for 20 to 25 minutes, toss with 1 to 2 tablespoons of oil and 1/2 teaspoon salt, then roast 15 to 20 minutes more until deep golden. Shake the pan halfway and let them cool completely before eating or storing.
Can I roast canned chickpeas instead of dried chickpeas?
Yes, and most home cooks do. Drain and rinse a 15 oz can, pat the chickpeas very dry, and roll them in a towel until the skins look matte and wrinkled. Because canning liquid soaks into the bean, give canned chickpeas an extra drying step and expect a slightly softer center than chickpeas cooked from dry.
What temperature and oven time make chickpeas crisp?
Use 400F in a conventional oven for 35 to 45 minutes total, split into a 20 to 25 minute dry stage and a 15 to 20 minute seasoned stage. Drop to 375F for convection and check five minutes early. In an air fryer, use 350F: 15 to 18 minutes dry, then 8 to 12 minutes after adding oil and salt.
Why are my roasted chickpeas crunchy outside but chewy inside?
Almost always too much water in the center. Canned or simmered chickpeas hold liquid inside the bean, and if the pan was crowded or the oven too cool, the outside dries while the middle stays soft. Fix it with more drying time, a single layer with space, and 400F. You cannot shortcut moisture out of the center with a shorter bake.
How should I store roasted chickpeas so they stay crisp?
Cool them fully on a wire rack first, then store in a jar or container left slightly open, or covered loosely with paper. Sealing warm chickpeas traps condensation and softens them overnight. Expect them to stay crunchy for a few days this way, and refresh a soft batch at 350F for 8 to 10 minutes.
Conclusion
If you remember one thing about how to roast chickpeas so they get crispy, make it this: dry the chickpeas thoroughly, roast them in a spacious pan at high heat, and let them cool before you eat or store them. Skip any one of those three and the batch goes chewy, no matter how long you bake it.
Start with the plain salted method so you can taste the technique on its own. Once a batch comes out crunch, add smoked paprika, garlic powder and cumin, or go sweet with maple and cinnamon. The seasoning is the easy part. The drying and the cooling are what earn the crunch.