
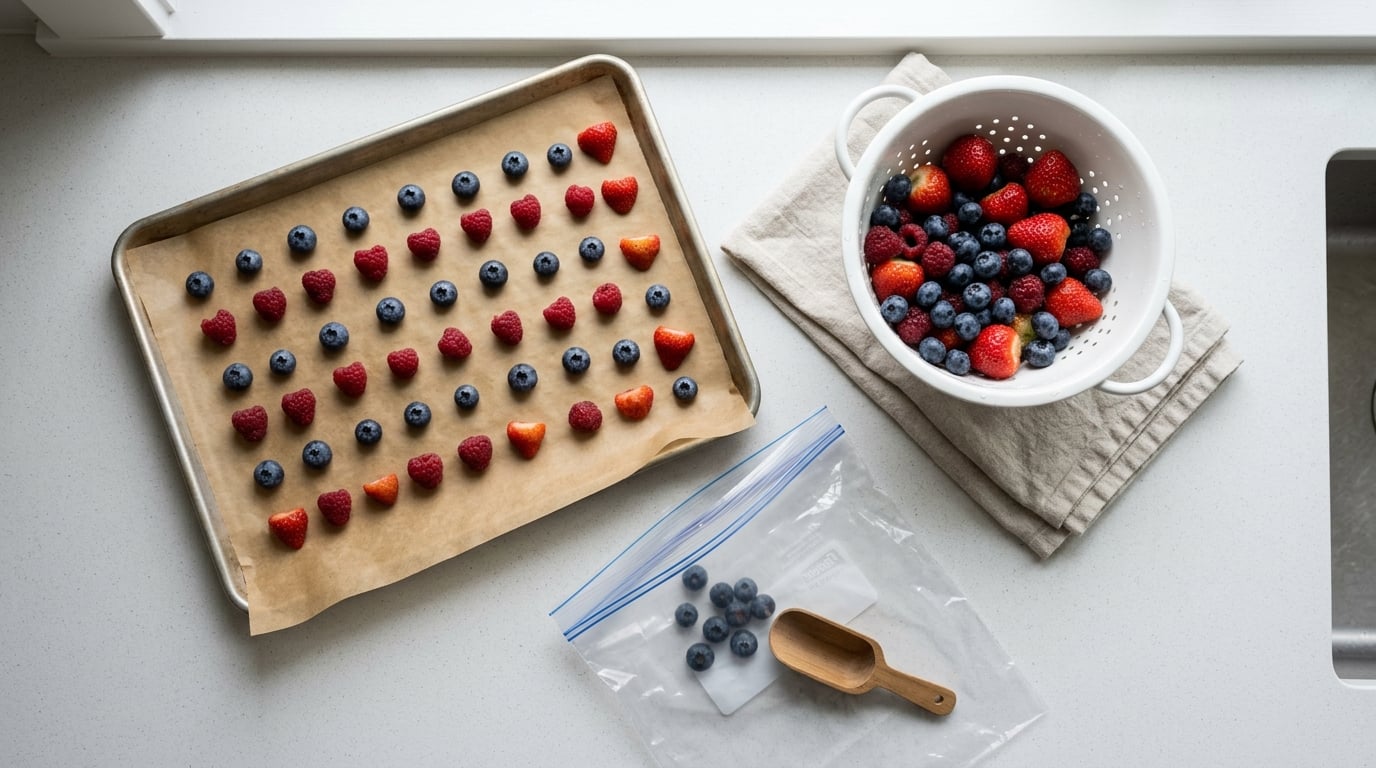
Berries clump because a thin film of water between touching pieces freezes first and welds them into one brick, and a slow freeze grows ice crystals large enough to rupture the cells and turn everything mushy. The fix is a pre-freeze: wash and dry the berries, space them on a lined tray so nothing touches, leave them uncovered until hard, then move them into a bag. The whole thing takes 20 minutes of work and a few hours of freezer time.
It’s the single most useful technique for anyone who buys strawberries in bulk, freezes a summer surplus, or just keeps blowing through bags of frozen berries for smoothies. I use it every time, and the difference is night and day: loose berries you can scoop a cup of, versus a bag you have to hit with a hammer.
One thing worth saying up front: clumping is a convenience problem, not a safety problem. A solid block of frozen berries is perfectly safe to eat. It’s annoying, and it thaws unevenly, but nobody is going to get sick from it.
Table of Contents
What You Need
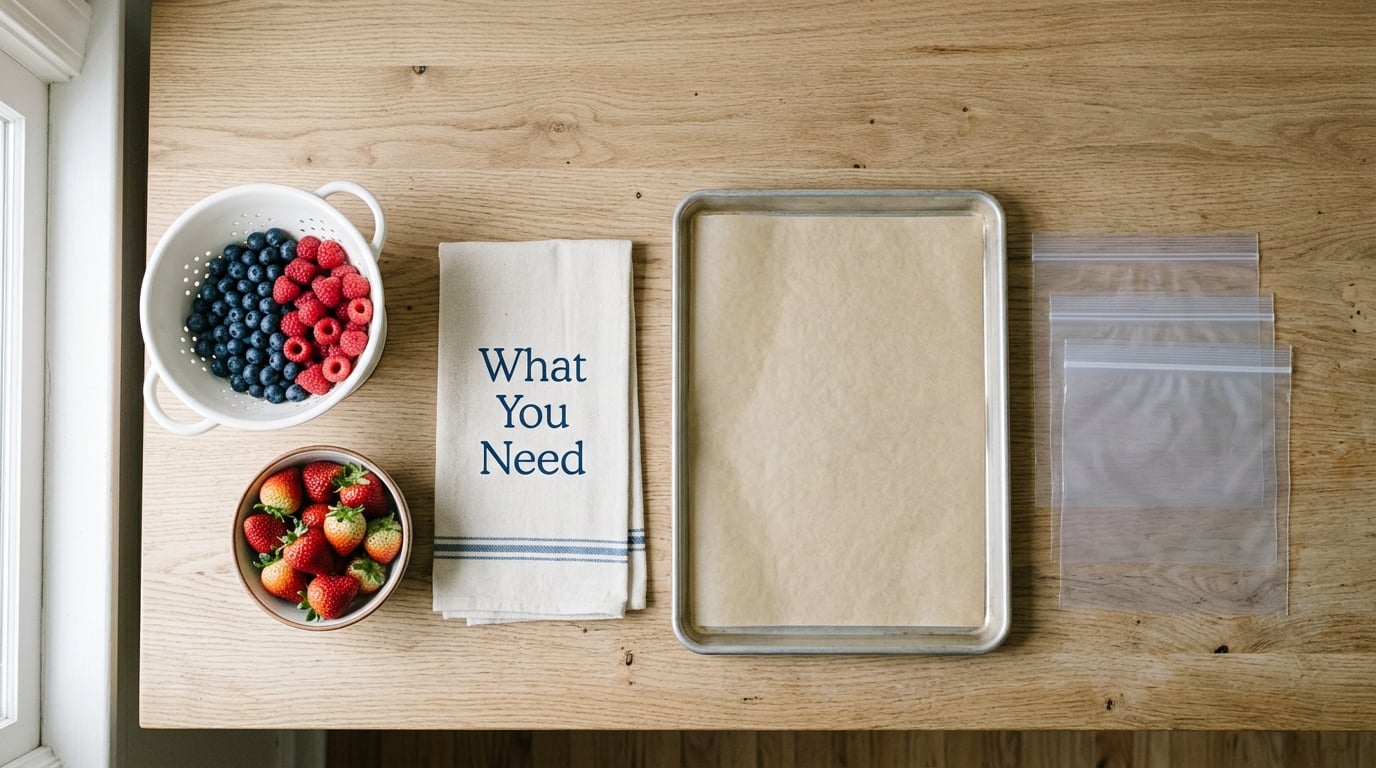
None of this is special equipment. If you have a rimmed baking sheet, a piece of parchment paper, and a freezer bag, you’re set.
- Fresh berries of any kind — strawberries, blueberries, raspberries, blackberries
- A colander or salad spinner for washing
- A clean kitchen towel or paper towels for drying
- A rimmed baking sheet or cookie sheet
- Parchment paper or a silicone baking mat to line it
- Freezer bags or rigid freezer-safe containers for the finished berries
- Optional: a little lemon juice or powdered ascorbic acid for cut fruit that browns
Line the tray with parchment if you don’t have a nonstick surface. It costs nothing, it lifts cleanly, and it saves you from scraping frozen berries off bare metal later.
Step-by-Step: How to Freeze Fresh Berries Without Clumping
The method is four stages and it works the same for every soft berry. Prep the fruit, lay it out loose, freeze it uncovered, then package it.
- Wash and dry. Rinse briefly, then dry until there is no surface water left — at least 20 minutes, longer for a big batch.
- Spread in a single layer with gaps. Every berry should have space around it. If they touch, they fuse.
- Freeze uncovered for 2 to 4 hours until the berries are hard all the way through, not just on the outside.
- Tip them into airtight packaging, label, and return to the freezer.
Total hands-on time is about 20 minutes per tray. You’ll know the pre-freeze worked when a berry dropped on the counter bounces rather than smears, or when you can feel hardness through the middle of one without snapping it.
How to Prepare Berries for Freezing
Prep matters more than most people expect, because damaged or wet fruit never recovers in the freezer.
Start by sorting. Toss anything soft, bruised, or showing a bit of mold. Freezing doesn’t stop spoilage, it just delays it, and one soft berry can turn a whole bag of surface moisture.
For strawberries, hull them and remove the white core, then halve or slice anything larger than a blueberry so you get an even freeze. A whole large strawberry freezes solid in the middle while the outside turns to ice.
Blueberries get a lighter touch. Farmers and market sellers commonly freeze them unwashed and wash them at the moment of use, because washed blueberries have a tendency to go soft and waterlogged on thaw. If you want to wash them, do it right before freezing and dry them thoroughly.
Skip the wash for raspberries and blackberries entirely. Their drupelets are fragile, water gets trapped between them, and a gentle rinse is more likely to break them apart than clean them. Rinse them only if you know they carry dirt from the garden.
The single-layer test is simple: put one berry on the towel and wait a few minutes. If it leaves a damp print, keep drying. Any water you trap at this stage becomes ice.
How to Freeze Berries Without Sticking Together
This is the stage people rush, and rushing it is what produces bricks.
Line your baking sheet and lay the berries out with a real gap between them — a fingertip’s width is the rule most home cooks use, and a LifeProTips thread on the subject put it more simply: it does not have to be much, three across is fine. The point isn’t a tidy arrangement, it’s that no two berries touch.
Put the tray in the freezer uncovered, set flat so nothing rolls together, and leave it for 2 to 4 hours. Larger berries take closer to four. If your freezer has a quick-freeze setting, use it for the first 30 minutes.
Don’t move the tray, don’t shake it to check, don’t stack a second tray on top while the first is still setting. A home freezer works slowly enough that a crowded middle layer will still fuse, which is why the gap matters more than the clock.
Work in batches if you have more fruit than tray space. It means more sessions and more trays in the freezer, but a smaller batch spaced properly beats one crowded pan every time.
How to Store Frozen Berries for the Best Results
Once the berries are hard, tip them off the tray and into packaging. Don’t scrape or rinse them first — that undoes the drying.
Freezer bags are fine, with two conditions: the berries are already frozen solid, and you press the air out before sealing. A bag of loose berries with the air squeezed flat keeps better than a loosely tied bag full of air, which is how freezer burn happens. Leave a couple of inches of headspace because water expands when it freezes and a sealed bag can split.
For long storage, portion first. Flat, single-serving bags freeze into thin slabs you can snap apart with your fingers, and a 300 g bag covers a crumble while 150 g covers a smoothie. Write the date and the weight on the bag with a marker. For storage beyond a year, double-wrap the portion in a second bag.
How long they keep depends on the berry and how warm your freezer runs. A chest freezer holds a steadier 0°F than a fridge-freezer, and steadier temperature means smaller ice crystals and better texture. Temperature swings are what gradually ruin texture in a door-side drawer.
| Berry | Keeps well frozen | Best after freezing for |
|---|---|---|
| Strawberries | 9 to 12 months | Smoothies, baking, sauce |
| Blueberries | 9 to 12 months | Baking, eating straight from frozen |
| Raspberries | 6 to 9 months | Smoothies, jam, drinks |
| Blackberries | 9 to 12 months | Cobblers, syrups, baking |
| Mixed soft berries | 6 to 9 months | Any use, eaten sooner |
Thaw in the fridge, not on the counter, and give it overnight. Fruit that sits warm for more than about two hours enters the same 40°F to 140°F range where bacteria multiply, and thawed berries are no exception to the two-hour rule.
Common Mistakes
Five things account for nearly every clumped bag I’ve seen.
Washing and bagging wet berries. Water left on the surface freezes into a glaze that bonds neighbours together. Fix: dry to the single-layer test before anything else happens.
Crowding the tray. A heaped pan freezes from the edges in, so the middle layer fuses into a mass no amount of extra time will fix. Fix: one layer, gaps everywhere, more batches.
Moving them too early. Two hours of firm surface isn’t enough on large berries. Fix: test one from the middle of the tray; if it’s hard all the way through, move the batch.
Thawing and refreezing. Refrozen berries release more water than they took in, and they come back mushy and stuck. Fix: only refreeze if they thawed in the fridge and stayed cold, and expect a softer result.
Loose packaging. Air in the bag drives freezer burn and dries the fruit out. Fix: press the air out, seal flat, and leave headspace.
One extra note: don’t try to break up a frozen block with hot water. It thaws the outside into a wet puddle while the centre stays solid, and you end up with berries that are both mushy and still frozen.
Helpful Tips
Dust cut berries with a little lemon juice or powdered ascorbic acid when colour matters, such as for a fruit salad or a pie you want to serve without grey slices. It slows browning without making the berries taste lemony at more than a light touch.
A shallow silicone ice-cube tray or a silicone mat handles small batches without a rimmed baking sheet. Portion into it, freeze, then pop the frozen pods into a bag — this is the tray-free route for a handful of strawberries.
Soft berries that still slump after the pre-freeze can get a second freeze after bagging. It firms them up enough for baking, and I’d expect a softer texture either way.
Decide how you plan to use them before you pack them. Dry-frozen berries are right for smoothies, oatmeal, and baking. Berries tossed with sugar — roughly 150 g sugar per 1 kg fruit — are for crumbles and strudel, where a syrupy texture is the point. Berries in syrup are for compote and stewed fruit, and for desserts where you want distinct pieces rather than one blended mass.
For baking, add the frozen berries straight into the batter and expect to add a little extra bake time, since the fruit releases water as it heats. Tossing them in a spoonful of flour first keeps that water from turning your batter grey.
Frequently Asked Questions
Should frozen berries be washed before freezing?
For strawberries and blueberries, a quick rinse just before freezing is fine, then dry them thoroughly. For raspberries and blackberries, skip it — water gets trapped between the drupelets and they turn waterlogged on thaw. Washing at the moment of use gives the same result with none of the freezing damage.
How long do frozen berries stay fresh?
Strawberries, blueberries and blackberries keep their quality for 9 to 12 months at 0°F, while raspberries and mixed soft berries are best used within 6 to 9 months. A chest freezer holds a steadier temperature than a fridge-freezer, which keeps ice crystals smaller and texture better. Label bags with the date so you use the oldest first.
Can I freeze berries without a baking sheet?
Yes, for small batches. A silicone ice-cube tray or a silicone mat on a flat plate works — freeze in one layer with gaps, then transfer to a bag. The tray is not doing anything magic; it just keeps berries from touching during the pre-freeze. A single layer on a plate gets you there for a dozen strawberries.
Why are my frozen berries sticking together?
Usually surface moisture, crowding, or moving them before they fully froze. A film of water between touching pieces freezes first and welds them together, and slow freezing grows ice crystals that rupture cells. To freeze fresh berries without clumping, dry them completely, space them with a fingertip’s gap on a lined tray, and leave them uncovered for 2 to 4 hours.
Can I use frozen berries in smoothies, oatmeal, or baking?
Yes, and frozen is often better than thawed. Smoothies and overnight oats take berries straight from the freezer. For baking, add them without thawing and allow extra bake time, since the fruit releases water as it cooks. Tossing berries in a little flour keeps that moisture from discolouring the batter.
Conclusion
Start with one tray tonight. Wash the berries, dry them until nothing leaves a damp print, space them on a lined baking sheet with a fingertip’s gap between each one, and leave the tray uncovered for 2 to 4 hours. Once they are hard all the way through, tip them into a labelled bag, press the air out, and put it back in the freezer.
That pre-freeze is the whole trick. It gives you berries you can scoop one cup at a time instead of a block you have to attack, and the fruit comes out of the freezer with noticeably better texture than anything that went in wet, crowded, or rushed.