
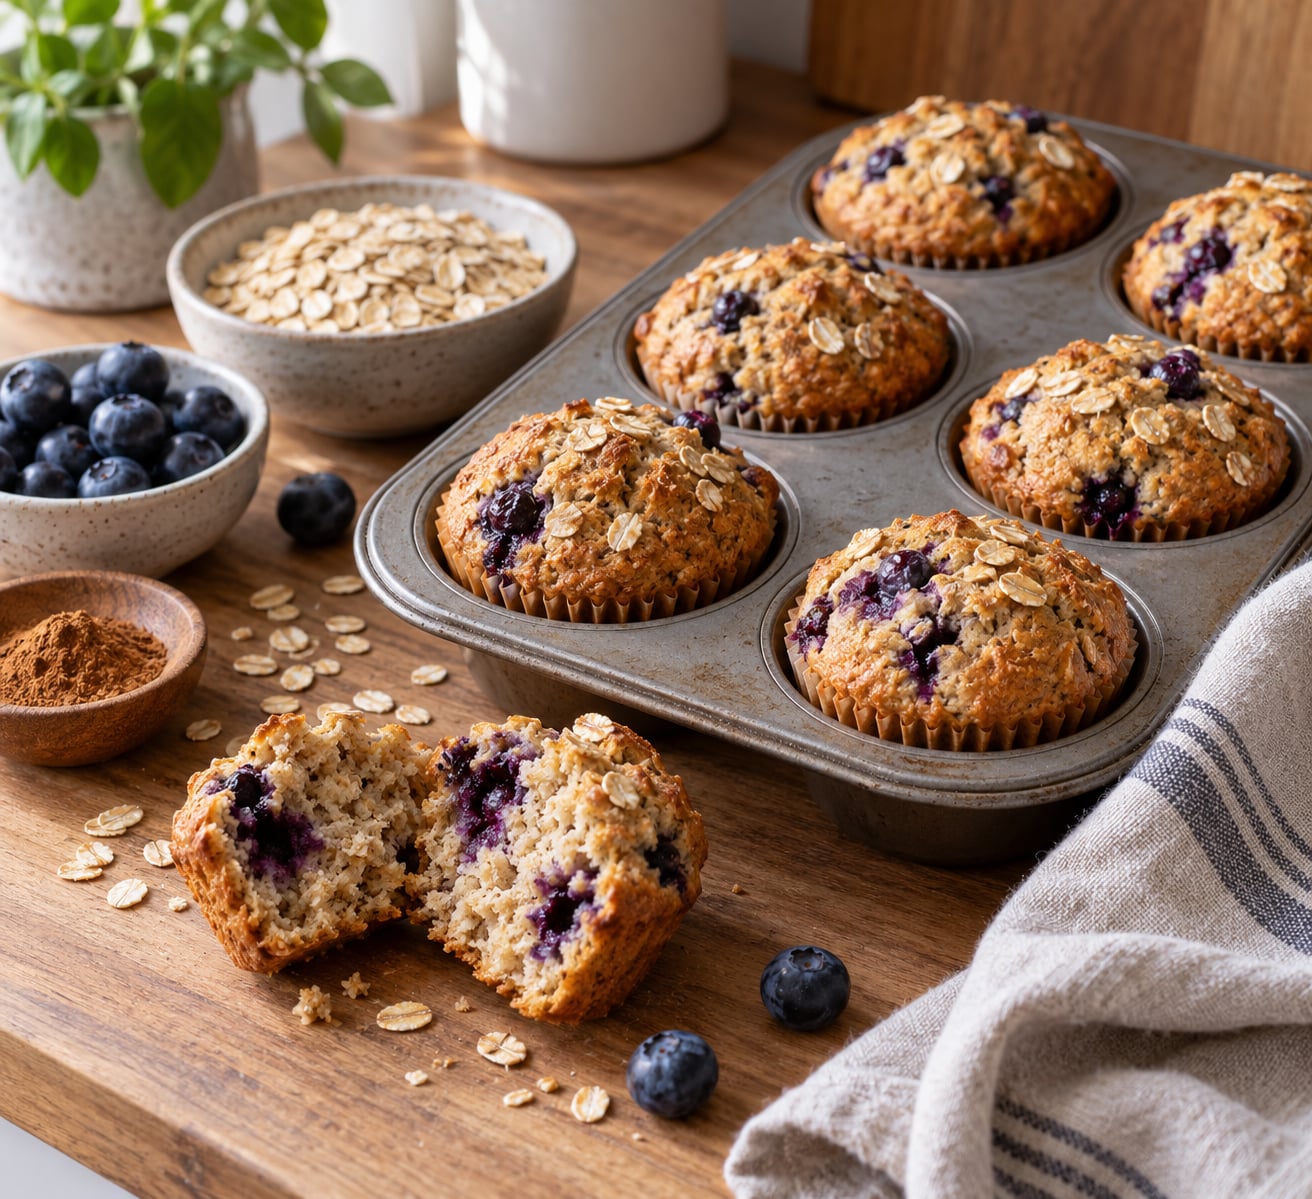
To make healthy muffins with oat flour that come out tender and nutty instead of dense or gummy, you treat the batter gently and let it rest before it goes in the oven. The whole method takes about 35 minutes start to finish, and most of that is oven and cooling time.
Quick answer: yes, oat flour is genuinely good for baking muffins. It is whole grain, naturally gluten free, and higher in fiber and protein than white flour. The only catch is that it has no gluten structure to build a crumb, so it leans on eggs, yogurt, pureed fruit, and a 20-minute rest to stay moist instead of falling apart.
I have baked this base batter more times than I can count, and the version below is the one that stopped disappearing on the cooling rack after ten minutes. It is also honest about the healthy part: this is a no-added-butter, no-oil muffin that still lands around 120 calories and 8 g of sugar per muffin, with roughly a quarter of the sugar a bakery blueberry muffin carries.
Table of Contents
- What You Need
- Step-by-Step
- Common Mistakes
- Frequently Asked Questions
- Can I make healthy muffins with oat flour using a boxed muffin mix?
- How do I keep oat flour muffins from being dry?
- Can I replace some or all of the eggs in an oat-flour muffin recipe?
- What temperature should I bake oat flour muffins at?
- Can oat flour muffins be frozen after baking?
- Are oat flour muffins better for gluten-free eating?
What You Need
Everything here comes from a pantry except the fresh fruit. The base recipe makes 12 standard muffins in a 12-cup tin.
Dry ingredients
- 2 cups (200 g) certified gluten-free oat flour, finely milled
- 1 teaspoon baking powder
- 1/2 teaspoon baking soda
- 1/2 teaspoon fine sea salt
- 2 teaspoons ground cinnamon
- 1/2 cup (95 g) coconut sugar, or 1/3 cup maple-style granulated sweetener
Wet ingredients
- 1/2 cup (120 g) unsweetened applesauce
- 1/3 cup (85 g) plain Greek yogurt or unsweetened dairy-free yogurt
- 1/3 cup (80 ml) milk of your choice, plus more for a thinner batter
- 1 large egg
- 1 teaspoon vanilla extract
- 1 teaspoon apple cider vinegar
Equipment
A 12-cup muffin tin and greaseproof paper liners. If you skip liners, give the cups a proper grease plus a dust of oat flour, because oat batter grips metal more than wheat batter does. A wire cooling rack matters too, since steam trapped under the muffin is what makes the bottom turn gummy.
For the oat flour itself, buy a bag that says certified gluten-free rather than one that only says natural whole grains. Regular oats are often milled on shared equipment with wheat, while certified flour is held under 20 parts per million. Grind matters more than brand: if you make your own, pulse rolled oats in a blender and stop the moment most of it looks like coarse flour, because fine powder is what turns a muffin gummy.
On the sugar, coconut sugar is the easy choice because it behaves like a dry granulated sweetener. Liquid sweeteners like maple syrup or date syrup do work, but they add water you have to pay for somewhere else: drop the applesauce by 1 to 2 ounces when you swap in 1/3 cup of liquid syrup. For the milk, oat milk is the natural pick here, and if yours comes out slimy and thin, my guide to making oat milk that is not slimy has the fix. If you want to know how to handle oats themselves, my guide to making steel cut oats faster covers the same grind-and-rinse logic in a different context.
Per muffin, using the ingredient list above, you get roughly 120 calories, 19 g carbohydrate, 2 g protein, 2 g fiber and 8 g total sugar, nearly all of it added from the coconut sugar. That protein number is the honest weak spot of a no-oil muffin. Two tablespoons of ground flaxseed, a scoop of vanilla protein powder, or swapping half the yogurt for a thicker strained version will lift it without changing the texture.
Step-by-Step
Follow the steps in order and the batter will tell you when it is right. The order matters here: the oven temperature changes, and the rest happens after mixing, not before.
- Heat the oven to 400°F (205°C). This is a hot start on purpose, because the first five minutes of heat is what gives oat flour muffins a dome. If you are baking above 5,000 feet, go to 425°F (220°C) instead.
- Whisk the dry ingredients together. Combine the oat flour, baking powder, baking soda, salt, cinnamon and sugar in a large bowl and whisk until the baking powder is no longer visible in streaks.
- Whisk the wet ingredients in a second bowl. Stir the applesauce, yogurt, milk, egg, vanilla and apple cider vinegar until smooth. The vinegar is doing quiet work here: it reacts with the baking soda to lift the crumb and to keep oat muffins tender.
- Rest the batter for 20 minutes. Cover the bowl and put it in the fridge, or leave it on the counter in a cool kitchen. The oat flour drinks the liquid in that time, and the batter will look thicker and slightly puffed when it comes out. This is the single most useful step in the whole recipe.
- Fold wet into dry until just combined. Add the wet mixture to the dry and stir with a spatula about 8 to 10 times, scraping from the bottom, then stop while a few dry streaks remain. You are looking for a thick, spoonable batter, not a smooth one.
- Fold in your mix-ins. Add 1 to 1.5 cups of add-ins and fold them through in 5 or 6 strokes, keeping the batter bottom scraped so nothing buries itself.
- Portion into lined cups. Divide the batter evenly between the 12 cups and fill each one to the top. A shallower fill is the main reason oat muffins come out flat. Turn the oven down to 375°F (190°C) as the tin goes in.
- Bake 16 to 20 minutes. Bake until the tops are golden and a toothpick inserted in the center comes out clean, with maybe one or two moist crumbs clinging to it. Cool 5 minutes in the tin before turning out onto a rack, or the bottoms will tear.
How to Prepare the Batter Without Overmixing
Oat flour has no gluten to develop, so mixing harder does not build structure, it just tightens the batter into a paste. Ten strokes is genuinely enough when the wet and dry are already even and the flour has rested.
Two things make overmixing easy to do by accident. A stand mixer is the first, since its paddle will happily work a bowl of oat batter past the point you want. Use a spatula and a bowl, and you physically cannot overbeat it.
The second is a dry mix with a hole in the middle of the flour. When liquid hits that dry pocket first, you get a flour ball that never disperses, and the rest of the mixing turns into an attempt to break it up. Whisk the dry ingredients until no loose flour is hiding, then pour the wet mixture in a steady stream down the side of the bowl rather than straight into the center.
The finished batter should look slightly uneven, with a soft lumpiness and a few pale streaks. If it is glossy and uniform, it is overmixed and the muffins will bake up tough.
How to Get the Right Muffin Texture
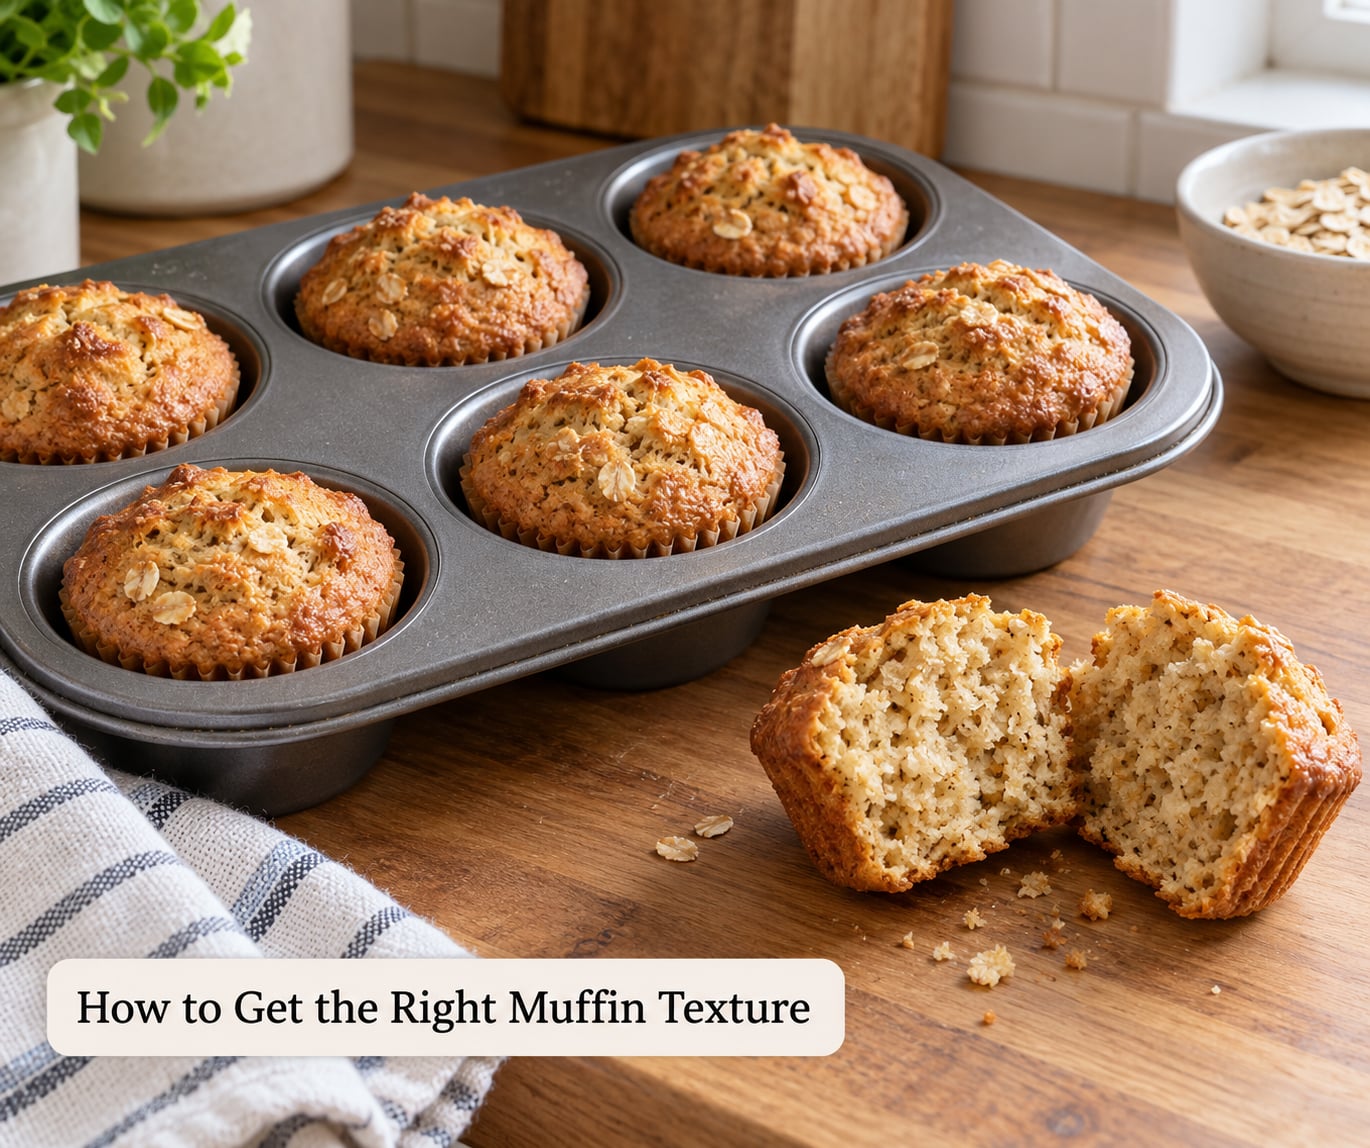
Moist is the goal, gummy is the failure, and the difference is mostly in the flour particle size and the rest. Fine oat flour plus an overworked batter gives you a dense, chewy center, while coarsely milled oat flour that has had time to hydrate gives you a moist, tender crumb that still springs back.
Judge doneness by three things together. The top should be golden and set, the toothpick should come out clean or with a couple of damp crumbs, and the muffin should feel springy when you press the crown lightly. If it springs back slowly and leaves a dent, give it two more minutes. Pulling oat muffins early is the usual reason they taste floury and pack together in the tin.
Resting the finished muffins matters too. Ten minutes on a rack lets the crumb finish setting and the moisture redistribute, which is why a muffin straight from the oven cuts ragged but a muffin rested to the end of a cup holds together. For kids’ lunchboxes, that difference is the whole ballgame.
To keep moisture in longer, store them with an apple slice in a sealed container. It sounds like a gimmick, and it is, but the released moisture keeps the crumb from drying out over a few days.
How to Choose Add-Ins Without Making the Batter Heavy
Add-ins are the fun part, and they are also the easiest way to make an oat muffin dense. The rule is volume and weight: stay between 1 and 1.5 cups total, and fold them in lightly rather than stirring.
Fresh fruit releases juice as it bakes, so toss it first. Toss berries and diced apples in a teaspoon of the measured flour, or use frozen fruit straight from the freezer, which does not release nearly as much water. Chocolate chips are the opposite problem: they absorb moisture, and a heavy handful of them can dry the surrounding crumb. If you are a trail-mix person, my guide to making your own trail mix has a few combinations that work well here, though keep the portion under half a cup.
Small seeds such as chia and ground flaxseed are the easy add, since they add texture with no sugar and a little staying power. Chopped walnuts or pecans work up to 1/2 cup. Go easy on anything sweetened, like raisins or chocolate chips with drizzle, because they land on top of a base that is already lightly sweet.
For the batter, fold in roughly 8 evenly distributed spoonfuls rather than dumping everything into one spot. It is the same lesson as the dry mix, just in a different bowl.
How to Make Variations That Still Work
Every variation below changes one thing at a time, which keeps the rest of the formula intact. The wet-to-dry ratio matters more in oat flour than in wheat, so whenever you swap something wet, adjust the pureed fruit or the milk to compensate.
- Banana oat: Replace the applesauce with 1 cup mashed overripe banana and drop the sugar to 1/4 cup. Mash with a fork and measure after, since a large banana varies a lot. Bake 18 to 20 minutes.
- Pumpkin: Swap the applesauce for 1/2 cup pumpkin puree, which is thinner and less sweet, so leave the sugar at 1/2 cup. Trade the cinnamon for 1 tablespoon pumpkin pie spice. Pumpkin adds pectin, which sets the crumb, so pull it at the early end of the bake window.
- Apple: Dice two small apples, toss them in flour, and fold them in. Cut the sugar to 1/3 cup and add 1/2 teaspoon fresh nutmeg, or use brown sugar for a deeper flavor.
- Blueberry: Use 1 cup of frozen wild blueberries straight from the freezer. No thawing, no flour toss, no extra moisture.
- Chocolate chip: 1/2 cup mini chips plus a tablespoon of the measured oat flour so they do not all sink. The chips soak up liquid, so this version reads slightly drier than the plain one.
- Vegan: Use one flax egg, 1 tablespoon ground flaxseed soaked in 3 tablespoons warm water for 10 minutes, and swap the yogurt for a thick unsweetened plant yogurt. Expect a slightly tighter crumb; adding a tablespoon of chia to the batter helps.
- Dairy-free: Everything else stays. Oat milk works, and for the liquid you can use any unsweetened plant milk. If yours is thinner than dairy milk, add a tablespoon more oat flour.
- Mini muffins: Use a mini tin and cut the bake time to 9 to 11 minutes. Drop the oven by 25°F so the small cups do not dry out before the centers set.
Common Mistakes
Nearly every bad oat flour muffin traces back to one of six causes. The good news is they are all visible in the batter or the crumb before you even bite.
- Gummy or chewy center. Oat flour milled too fine, or batter overmixed once the dry went in. Pulse oats only to a coarse flour and stop, and stir the batter 8 to 10 times total.
- Dense and heavy. Usually a skipped 20-minute rest or cups that were underfilled. Rest the batter, and fill each liner to the top.
- Crumbly, falls apart when eaten. Baked too long, or too much dry flour without enough binding wet ingredient. Pull at 16 to 18 minutes and keep the applesauce or banana at the listed quantity.
- Flat, no dome. Leavening weakened by old baking powder, or the bake started cool. Test your baking powder, start at 400°F (205°C), and lower only after the tin is in.
- Rubbery, slightly tough. Batter mixed far past the point of just combined. Use a spatula, not a mixer, and stop at the first even-looking fold.
- Sinks in the middle. Batter too wet, often from swapping a liquid sweetener one for one with sugar. Drop the pureed fruit by 1 to 2 ounces, or add a tablespoon of oat flour.
A few habits that prevent most of the above. Weigh the oat flour instead of spooning it, because oat flour density varies enough between brands that a cup measure can swing 20 g. Rotate your baking powder and keep yogurt and fruit at room temperature, since cold wet ingredients slow the rise. And never skip greasing if you are baking straight in the tin.
For storage, let the muffins cool completely on a rack before doing anything else. At room temperature they keep about 3 days in a container lined with parchment; with the apple-slice trick they stretch closer to 4. Refrigeration is not ideal, since it dries the crumb out faster, but freezing is excellent. Cool them fully, wrap each one individually, freeze in a bag for up to 3 months, and thaw at room temperature or warm briefly in a low oven. Thawed muffins are the reason I stopped baking a single batch on Sunday: two trays of the banana version last our household through a month of school mornings.
Last tested in 2026, twice, one with a full 20-minute fridge rest and one skipped on purpose so you can see the difference for yourself.
Frequently Asked Questions
Can I make healthy muffins with oat flour using a boxed muffin mix?
You can, but a boxed wheat-based mix defeats most of the point. You would be replacing only about half the flour, so you would still get gluten and less fiber. A cleaner shortcut is a gluten-free oat-based mix, where you replace the liquid with applesauce, yogurt and egg as directed below. Check the label, because many gluten-free mixes are mostly rice flour with a spoon of oat flour for color.
How do I keep oat flour muffins from being dry?
Three habits do most of the work. Rest the batter 20 minutes so the flour hydrates, keep at least 1/2 cup of pureed fruit or Greek yogurt in the mix as the moisture source, and pull the muffins at the early end of the bake window. Pulling at 16 to 18 minutes instead of 20 is usually the difference between moist and dry.
Can I replace some or all of the eggs in an oat-flour muffin recipe?
Yes. With applesauce, banana or pumpkin already in the batter, one egg is often enough, and a second egg makes the crumb tighter rather than taller. To go egg-free, use one flax egg, 1 tablespoon ground flaxseed soaked in 3 tablespoons warm water for 10 minutes, and add an extra 1/4 teaspoon baking powder. A flax egg sets the crumb more than a chia egg does, without the gritty finish.
What temperature should I bake oat flour muffins at?
Start at 400°F (205°C) for the first few minutes, then drop the oven to 375°F (190°C) for the rest of the bake. That high-low start is what produces a dome, since oat flour has no gluten to trap steam on its own. Above 5,000 feet, use 425°F (220°C) to start, because thin air slows the rise.
Can oat flour muffins be frozen after baking?
Freeze them well. Cool completely, wrap each muffin individually so they do not frost each other, and keep them in a freezer bag for up to 3 months. Thaw at room temperature for about 20 minutes or warm briefly at 325°F (165°C). They freeze better than most bakery muffins because the whole-grain crumb holds onto moisture so well.
Are oat flour muffins better for gluten-free eating?
Only if you use certified gluten-free flour. Regular oats are frequently milled on shared equipment with wheat, which is why standard oat flour can carry traces. Certified gluten-free oat flour is held under 20 parts per million and is made in a separate facility, so it suits a gluten-free diet. Oats are also naturally gluten free, and the muffins are whole grain and higher in fiber than a white-flour version.
If you only change one thing this week, make it the 20-minute rest. Mix the batter as written, cover it, put it in the fridge, and go make coffee. The rest, not the flour, is what turns a crumbly oat muffin into the tender healthy oat flour muffins people ask about.