
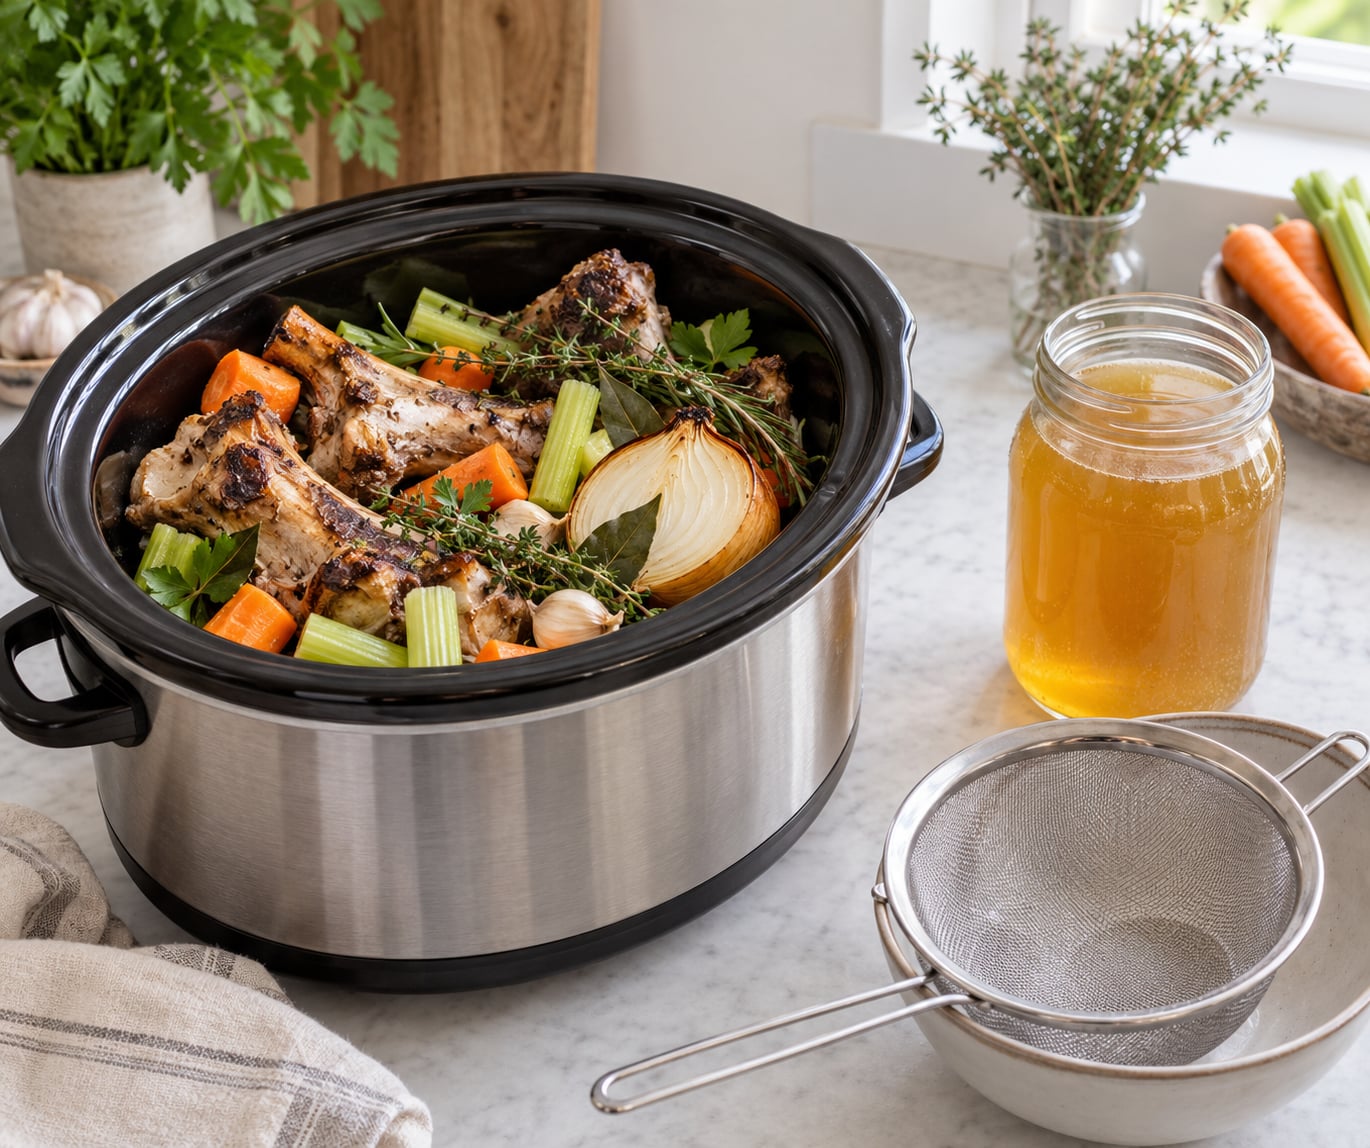
Learning how to make homemade bone broth in a slow cooker comes down to four things: enough bones, barely enough water, a long cook, and salt at the end rather than the start. Set it up in about ten minutes and let the appliance do 12 to 48 hours of work while you do other things.
Here is the short version before the detail:
- Roast the bones at 400F for 30 minutes until they smell toasty.
- Load a 5- to 6-quart slow cooker with bones, hard vegetables, two tablespoons of apple cider vinegar, and cold water to cover by an inch.
- Cook on high for about 12 hours, or low for 24 to 48 hours.
- Skim the foam off the top during the first couple of hours.
- Strain the liquid once the bones crumble easily.
- Chill it overnight to test the gel, then season and store.
A 6-quart cooker filled the right way gives you roughly two quarts of broth. That is a real difference from the shelf, where the good stuff costs several times more per cup than bones do at the butcher counter.
Table of Contents
What You Need
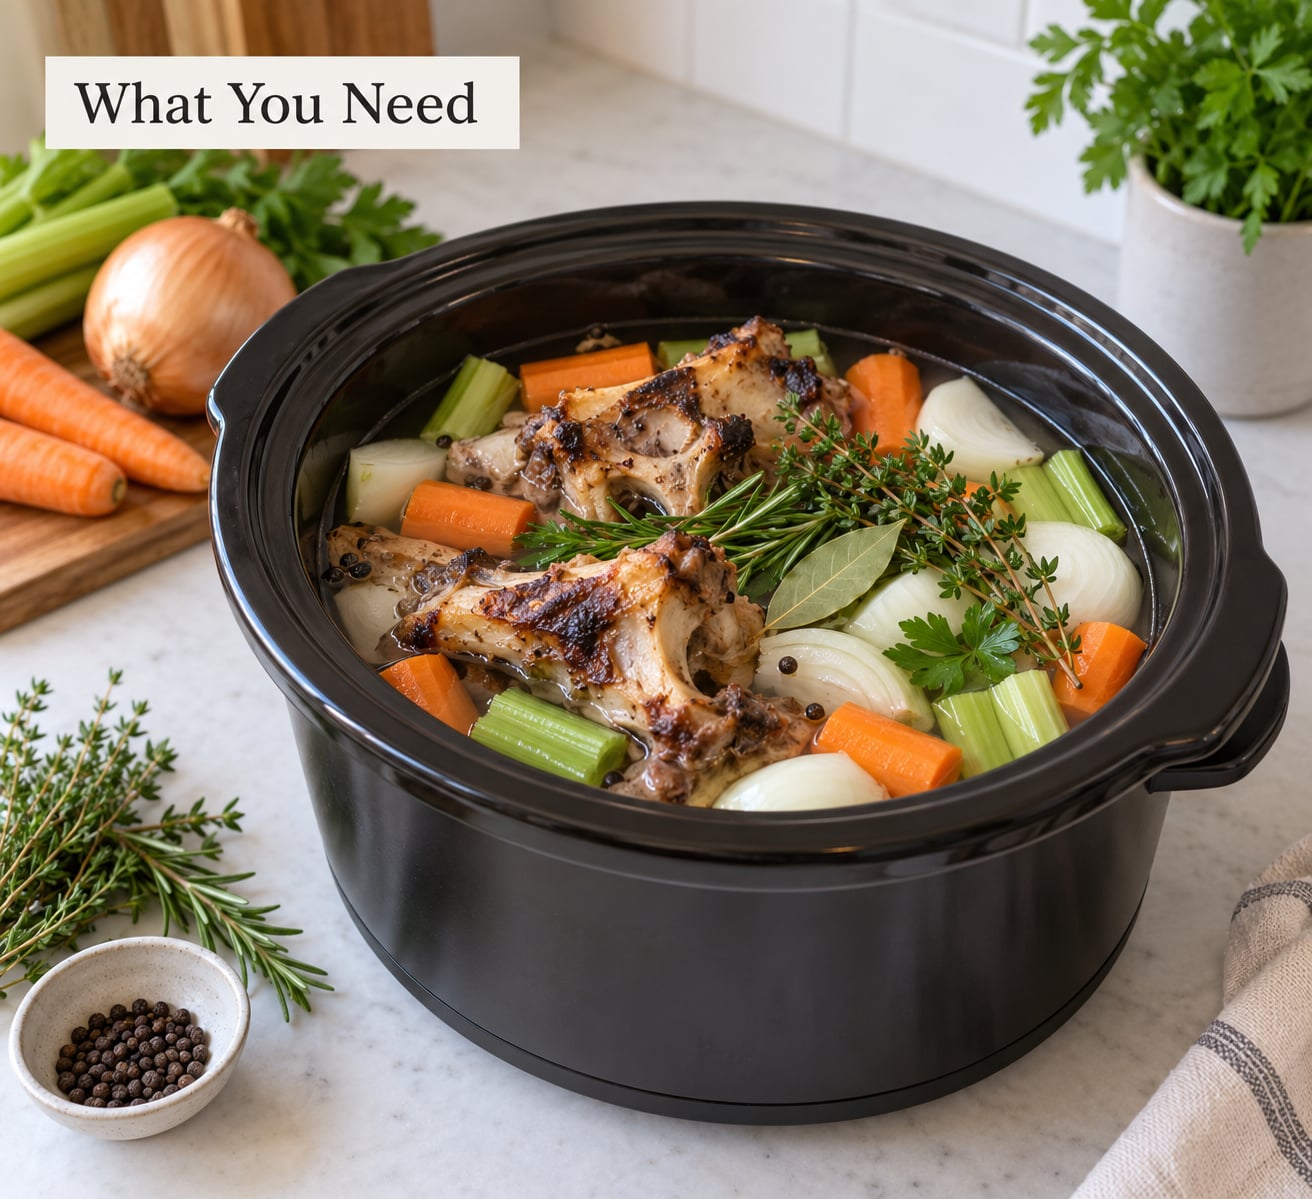
A 5- to 6-quart slow cooker is the sweet spot for a first batch. Anything smaller crowds the bones and pushes the liquid past the fill line once everything starts to swell, and anything larger makes it harder to keep the water level right.
For the bones, buy two to three pounds of mixed bones with plenty of connective tissue. Marrow and knuckle bones give body, chicken feet and necks give gel, and a saved carcass from a roasted chicken costs almost nothing.
The vegetables are a supporting cast, not the point. Two carrots, two celery stalks, one halved onion, and a whole garlic head split down the middle are plenty for a basic batch.
Two tablespoons of apple cider vinegar matter more than people expect. It does not make the broth taste tangy at that dose; it helps pull minerals out of the bone. Lemon juice works as a substitute if that is what you have.
Cold water is the liquid. Fill until the bones sit about an inch under the surface, and no further. More water gives you more volume but a thinner result that gels less reliably.
Optional tools that make it easier
A small skimmer or a slotted spoon saves you from fishing foam out of the liquid. A fine-mesh sieve, or a clean cotton towel draped over a colander, handles the solids. A vegetable peeler takes the skin off carrots and celery if you want a cleaner sip. A kitchen thermometer tells you what is actually happening inside the pot, which matters more than you would think.
What you can swap
Parsnip, turnip, leek, fennel, and leftover mushroom stems all work in place of the classic trio. Save your onion ends, carrot peels, and celery leaves in a bag in the freezer and make vegetable broth from kitchen scraps on the weeks you do not have bones going.
Step-by-Step: How to Make Homemade Bone Broth in a Slow Cooker
Choose and Prepare the Bones and Vegetables
Any sturdy bone works for how to make homemade bone broth in a slow cooker: beef knuckle and marrow, chicken wings and feet, turkey neck, pork hock, or a whole carcass. Joints and feet carry the most connective tissue, and that tissue is what turns into gelatin.
Ask the butcher for mixed bones with marrow. They are often cheaper than the “nice” cuts meant for roasting, and nobody wants them, which works in your favor. Precut bones from the meat counter are fine too. Buy them frozen if that is how they come, and thaw them in the pot with the water rather than on the counter.
Chop larger bones into two or three pieces so more surface is exposed. Roast them at 400F for about 30 minutes until the edges brown and the whole kitchen smells like a Sunday roast. Roasting is what tames the gamey note people complain about in beef broth.
Blanching is the alternative route: cover the bones with cold water, bring it to a boil, hold ten minutes, then dump that water and refill. You lose a little flavor and gain clarity. Pick roasting or blanching, not both, unless you enjoy extra dishes.
Cut your vegetables into large chunks. Add them partway through the cook, since hard vegetables added at the start collapse into mush and lose the sweetness you wanted in the first place.
Load the Slow Cooker Safely
Put the bones in first, then the vegetables, herbs, vinegar, and water. Leave at least two inches of headspace and stay under the fill line marked inside the pot. Bone marrow and connective tissue swell as they cook, and a pot filled to the brim will climb over the rim.
Set the cooker toward the back of the counter, away from the edge, with the cord routed so nothing dangles where a pet or a passing elbow could catch it. Keep the area clear so you can lift the lid for skimming without reaching over a hot surface.
Plugging in for 24 or 48 hours is fine on any appliance designed to run for a full day. Read your manual first, since some older models specify a maximum continuous run.
Cook Until the Bones Release Collagen
Chicken bones and feet are forgiving: about 12 hours on high, or 24 hours on low. Beef and turkey want longer, usually 48 to 72 hours on low, and the last stretch is where most of the gel comes from.
Starting on high gets you a usable pot in roughly half the time while still holding a gentle heat. What you do not want is a rolling boil. Slow cooker Low settings vary widely between models, and the hotter ones can scorch the bottom or boil the liquid down until the batch is too strong.
A thermometer settles the argument. Anywhere from 165F to about 195F is the useful range, and most pots sit in the middle of it. Above a hard boil, drop to low, or move the pot to the stovetop if your cooker runs hot.
Skim the grey foam off the top during the first two hours. It tastes fine if you leave it, but skimming keeps the finished broth cleaner and you can skip the longer straining job later.
You know it is close when the liquid clouds over and looks faintly milky, the connective tissue on the joints turns soft and stringy, and a bone crushes between two fingers instead of resisting. Then stop. Bone broth can go too far, and the result is thin and watery rather than richer.
Strain and Clarify the Broth
Pull the bones and vegetable pieces out with a slotted spoon first so you are not pushing sediment through the strainer. Then pass the liquid through a fine-mesh sieve, or through a clean towel held over a colander, and press the solids with the back of a spoon to get what is left.
Chilling overnight is the easiest clarification trick. The fat solidifies into a pale cap you lift off with a spoon, and the liquid underneath is noticeably cleaner and lighter.
Cloudy broth is not failed broth. Suspended fat, tiny bone particles, and emulsified gelatin all make broth look cloudy, and none of it hurts the flavor. If clarity matters to you, let the strained liquid sit in the fridge for a few hours and ladle it off without disturbing the sediment.
Season for Storage or Immediate Use
Taste the strained broth before adding anything. Broth that simmers for two days absorbs a surprising amount of salt from the bones, and a heavy hand now means a pot you cannot fix later.
Add salt in small increments, then taste again. A splash of the leftover apple cider vinegar brightens a flat batch more effectively than more simmering, and it is the same lever chefs reach for in a finished soup.
Fresh herbs belong in the last hour so they stay aromatic rather than turning hay-like. Garlic cloves added whole for the final stretch give a round, sweet background instead of a sharp one.
For a savory hit without salt, a spoonful of soy sauce, tamari, miso, or tomato paste works. These add umami and color, which is worth remembering when you compare bone broth with the vegetable-based stock you simmered from scraps.
Common Mistakes
- Filling past the fill line. The pot boils over and you lose the best part of the batch. Two inches of headspace is not optional.
- A hard boil on high. Some slow cookers run hot enough to scorch the bottom and drive off water, leaving a small pot of concentrated, sometimes bitter liquid. Check the setting after an hour.
- Vegetables at minute one. Carrots and celery turn to mush and lose their sweetness by the end of a 48-hour cook. Add them at hour four or later.
- Too much water. Extra water dilutes the gelatin concentration. Keep the bones covered by about an inch, and resist topping up during the cook.
- Bland broth. Usually too little bone, too short a cook, or no acid. Marrow-rich bones with a full 48 hours fix it far more often than extra seasoning does.
- Salty broth. Add unsalted stock, water, or a mild vegetable broth and simmer for a few minutes to reduce. You cannot take salt out.
Why Is My Bone Broth Cloudy or Weak?
Some cloudiness is normal and comes from emulsified fat, connective tissue, and small bone particles. It is a cosmetic issue, not a flavor issue.
Weak or thin broth has a shorter list of causes:
- Not enough bones. More bone by weight means more available collagen. Meat yields very little.
- Not enough time. Twelve hours is a starting point for chicken, not a finish line for beef.
- Too much water. The same liquid simply cannot set if it is stretched.
- No acid at the start. Without a little vinegar the mineral and gelatin extraction is slower.
- A cooker that never gets hot enough. Very slow and very hot cookers are both fine. A cold pot on Low for 48 hours is not.
- Bones roasted but burned. Blackened edges turn bitter and can mask the whole pot.
To test your result, put a cup of broth in a clear glass and chill it overnight. A good batch turns wobbly and semi-solid, somewhere between soft jelly and a firm aspic. If it stays like thin juice, extend the next batch by a day or add more feet and necks.
Tips for Using and Storing Homemade Broth Safely
Cool the broth quickly. Set the crock insert on a trivet or folded towel and stir occasionally so the hot middle cools faster, or ladle it into shallow containers and refrigerate those. Never seal a steaming pot of broth and leave it on the counter overnight.
Refrigerate broth for no more than three to four days. Freeze it in portions for about three months, which covers most of what you will realistically use. Ice cube trays work well for sauces and small soups, silicone molds suit a week of lunches, and freezer bags laid flat keep the volume for a whole pot of soup later.
Thaw in the refrigerator, not on the counter, and reheat only the portion you are eating. Bring it to 165F and stir, since the fat and gelatin settle and the hot spots need even heat.
Refrigerated and frozen broth are not shelf-stable. Getting food that stays safe on a pantry shelf requires pressure canning at a validated temperature and time, which is a different process with different equipment, not something you improvise with a slow cooker.
Beyond soup, a cup of broth works as the cooking liquid for grains. Try it in a pot of savory oatmeal instead of water for a deeper flavor.
Frequently Asked Questions
How long do I make bone broth in a slow cooker?
Plan on 12 hours on high for chicken bones, 24 to 48 hours on low, and 48 to 72 hours on low for beef or turkey. Chicken feet and necks gel fastest. Start on high if you want broth sooner, then drop to low so the liquid simmers gently. Extending the cook helps, but a broth that boils hard or runs dry loses quality, so check the setting after the first hour.
What kind of bones are best for slow-cooker bone broth?
Bones rich in connective tissue gel best: chicken feet, necks, and wings, plus beef knuckle, marrow, and oxtail. Marrow adds richness, while feet and joints supply the most gelatin. Very meaty cuts yield little. Buying a saved carcass or a turkey neck after a holiday is often the cheapest route to a strong batch.
Do I need to blanch or roast the bones first?
Pick one. Roasting at 400F for 30 minutes browns the bones and removes the gamey flavor people notice in beef broth, and it is the step I would keep. Blanching means boiling the bones briefly and discarding that water, which gives a clearer but lighter broth. Skipping either step still works; you simply trade some flavor for convenience.
Can I freeze homemade bone broth?
Yes, and freezing is the easiest way to keep a large batch. Cool it quickly, ladle it into freezer bags or containers with a little headspace, and freeze for about three months. Ice cube trays suit small amounts used for sauces and soups. Thaw in the refrigerator rather than on the counter, and reheat only what you need to 165F.
Is bone broth the same as stock?
Not quite. Bone broth is simmered long, usually 12 to 72 hours, with a high proportion of bones and connective tissue, so it gels when chilled and tastes richer. Stock is typically a shorter cook with more meat, vegetables, and aromatics, and it stays thin. The two work interchangeably in most soups, though broth carries more body.
Why does my slow-cooker broth taste weak?
Weak flavor usually traces back to too few bones, too little time, or too much water. Bones should be covered by about an inch of cold water, not submerged, and hard vegetables go in partway through so they do not turn to mush. A tablespoon or two of apple cider vinegar at the start helps. Salt and fresh herbs at the end finish it off.
Conclusion
Pick a 5- to 6-quart slow cooker, roast two to three pounds of marrow and joint bones, and cover them with cold water by an inch. Start on high, skim for the first couple of hours, then let it run for 24 to 48 hours on low. Strain it, taste it, and add salt last. That method is forgiving enough that a first batch still tastes good while you learn what your own cooker does on Low.