
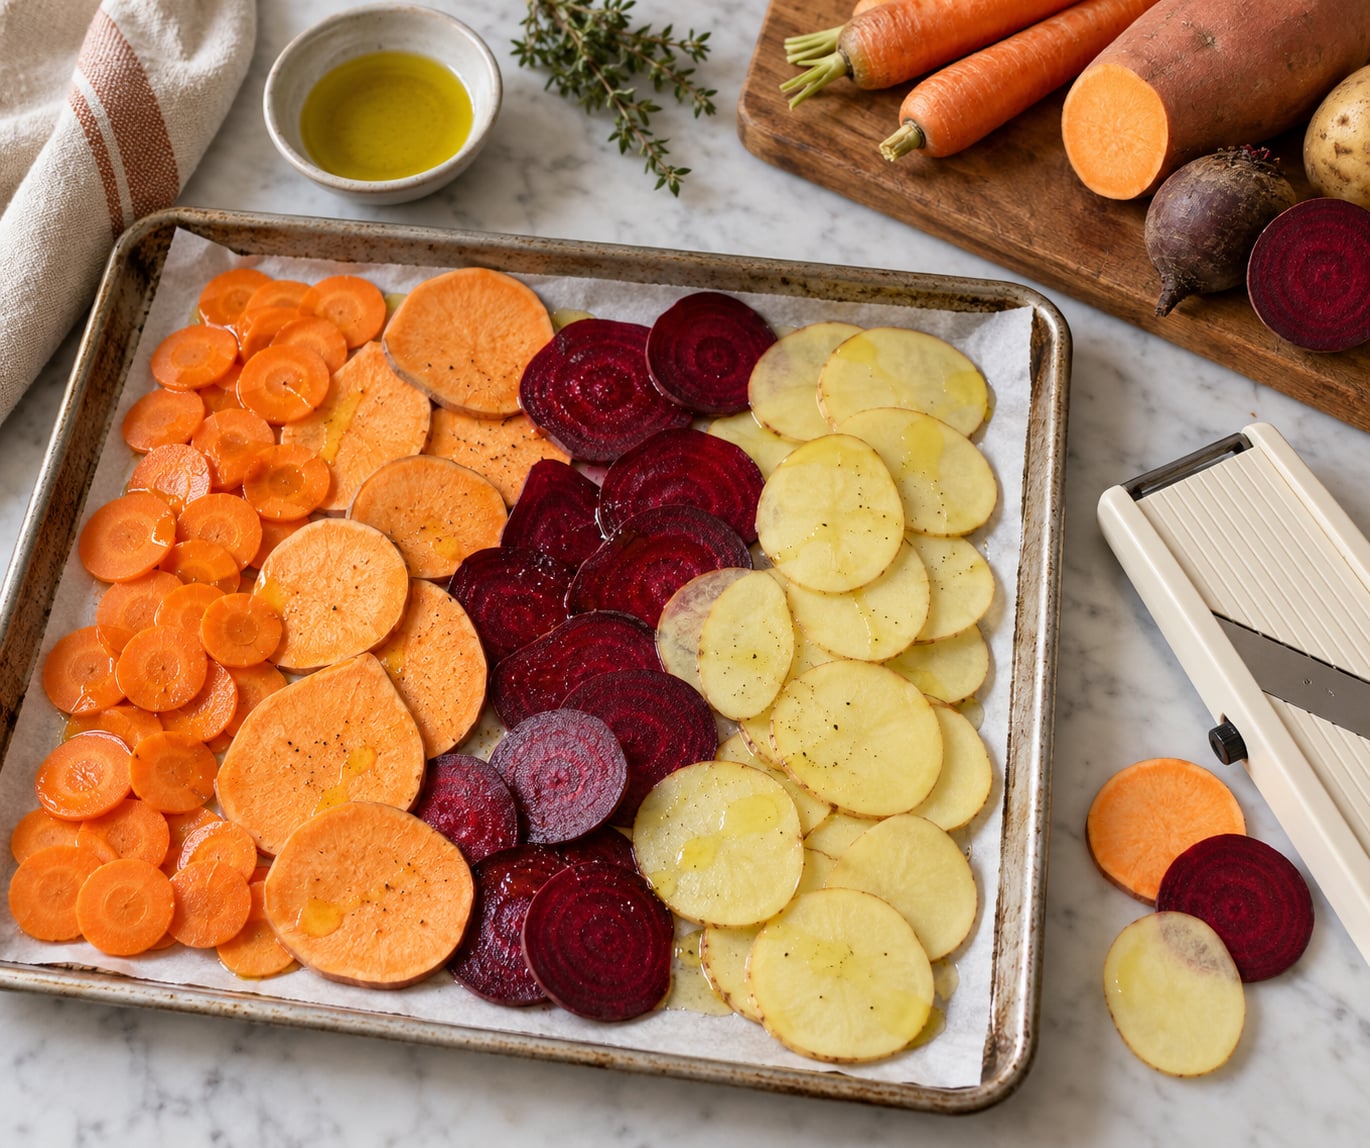
How to make veggie chips at home is mostly about moisture control: slice low-moisture vegetables paper thin, blot off surface water, coat them lightly with oil and salt, then bake low and slow until the edges curl and the last of the water is gone. That method takes about 35 minutes of active work and produces chips that snap rather than bend.
The base recipe, for about one pound of finished chips:
- 1 lb mixed root or firm squash vegetables, peeled (sweet potato, beet, parsnip, carrot, turnip, kale or brussels sprouts)
- 1 to 2 tbsp olive oil or avocado oil
- Fine sea salt, 1/2 tsp to 1 tsp depending on the vegetable
- Freshly ground black pepper
- Optional: smoked paprika, garlic powder, onion powder, curry powder, chili-lime salt or cinnamon sugar
No mandoline, no deep fryer, no dehydrator. A regular oven and one sheet pan will do it. If you have a spiralizer in a drawer, this is a good week to dig it out.
Table of Contents
What You Need
The equipment list is short, and only one item on it is close to essential. Everything else you probably already own.
- A mandoline slicer, spiralizer, or a very sharp knife. Thin, even slices are the single biggest factor in whether chips crisp at the same rate.
- Two rimmed baking sheets. Two trays let you bake two vegetables at once at different temperatures, which is how you stop sweet potato from burning before carrot finishes.
- Parchment paper or silicone baking mats. Parchment is better for thin slices that would otherwise weld themselves to the pan.
- Paper towels and a small bowl or colander. For blotting.
- A pastry brush or your clean hands. For the oil coating.
- An airtight container, ideally metal. Plastic traps moisture and turns crisp chips chewy within hours.
On slicers: a mandoline gives you an adjustable blade and a repeatable 1/16 inch setting, which is the most reliable route to consistency. A spiralizer produces long ribbons, and they crisp unevenly because the middle of a ribbon is thicker than the ends, so plan on thinner vegetables like zucchini or carrot. A sharp knife works fine; it just takes longer, and you have to measure the first slice against a ruler to know you are in the right zone.
On vegetables: low-moisture roots and firm squash are the winners. Sweet potato, russet or gold potato, beet, parsnip, carrot, turnip, rutabaga, celery root, kabocha squash, kale and brussels sprouts all slice thin and dry out properly.
Hold off on tomato, cucumber, eggplant, zucchini and summer squash. Their water content is so high that by the time the centre is dry, the edges have burned to carbon. Zucchini chips can work, but they need a dehydrator or the very lowest oven setting, and even then they soften again within a day. If zucchini is what you have, slice it at 1/16 inch, skip the salt until after the bake, and treat it as a same-day snack.
On oil: olive oil and avocado oil are the two that handle high heat without going bitter. A neutral oil like canola works too. Sesame oil is good but burns fast, so add it after baking with a pastry brush instead of before. One to two tablespoons per pound of raw vegetable is plenty. More than that and you get greasy chips rather than crisp ones, because the oil has to cook off for the chip to feel right.
On seasoning: salt shrinks the vegetable by roughly half, so season lighter than you would at the table and taste one chip before deciding whether you need more. Three combinations cover most people:
- Smoky savoury: smoked paprika, garlic powder, onion powder, black pepper.
- Warm curry: curry powder, cumin, a pinch of cayenne, flaky salt.
- Sweet: cinnamon, a small amount of maple or honey mixed with olive oil, and a pinch of salt to bring it forward.
How to Make Veggie Chips at Home: Step-by-Step
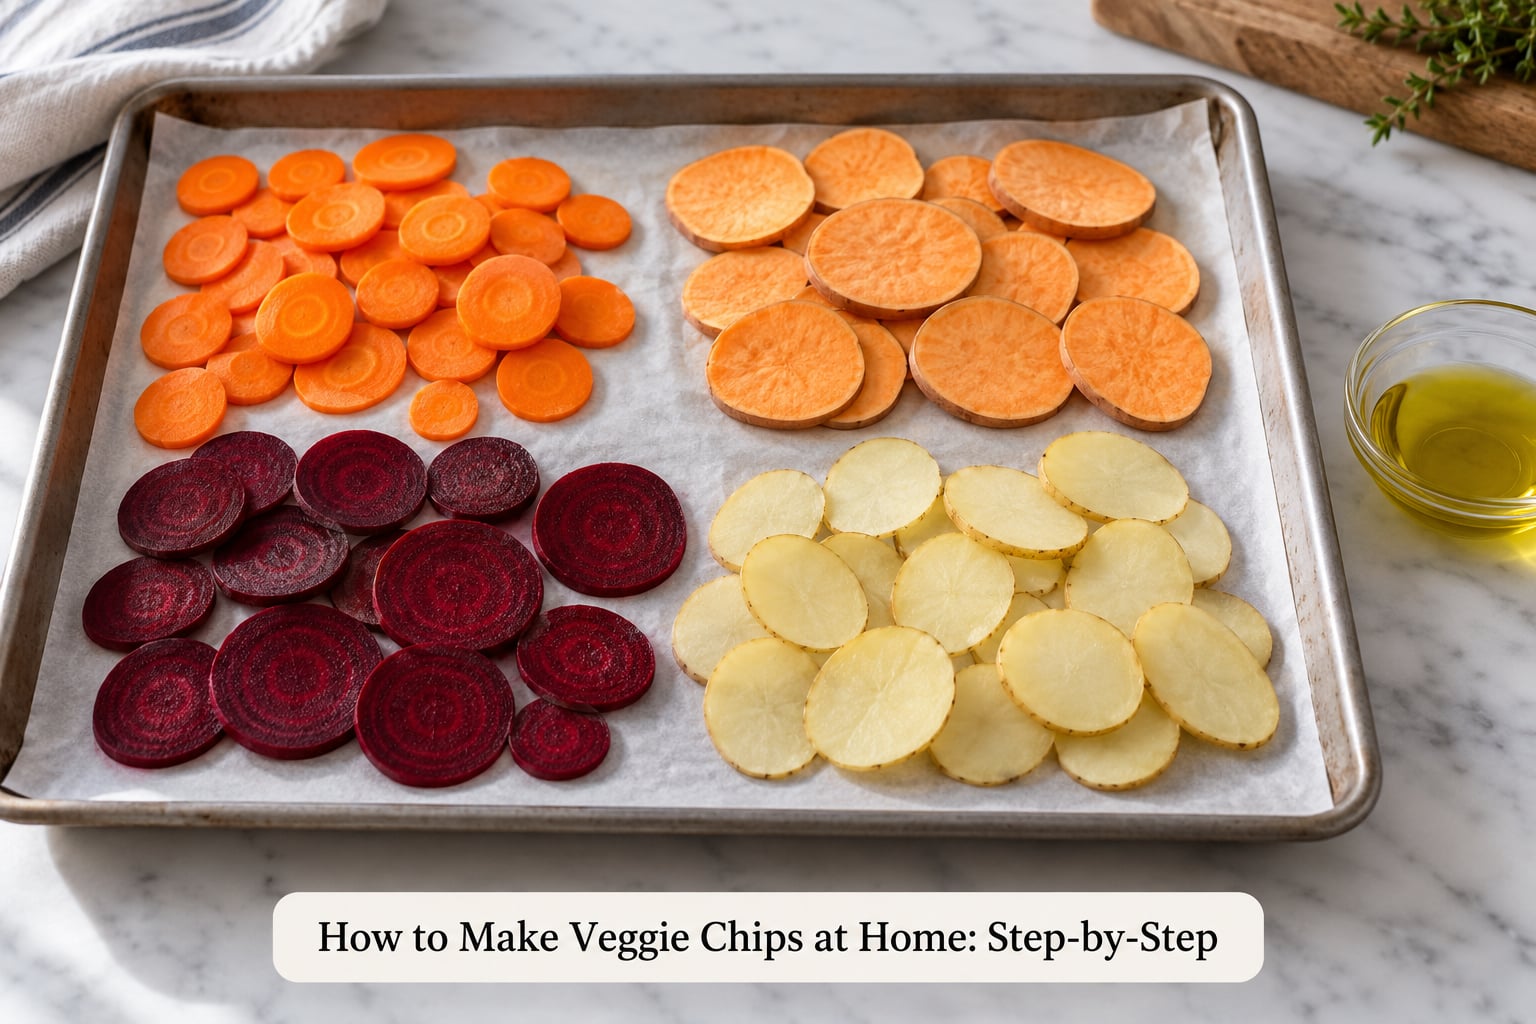
Total time is 40 to 60 minutes depending on the vegetable. Active time is maybe 15 minutes; the rest is the oven doing its job while you do something else.
Choose and Prepare the Vegetables
Wash the vegetables and scrub any dirt off with a stiff brush, since thin slices trap grit. Peel anything with a tough or bitter skin, and leave the peel on anything where it is thin, mild and colourful, because that is where a good share of the fibre sits.
If you have a large carrot or beetroot surplus coming due, blending carrot juice and chips are two different ways to use the same pile.
Dry them thoroughly before they meet the slicer. Water on the outside of a vegetable makes the blade skip and the slices rip instead of separating cleanly. Pat them dry, then slice.
Thickness matters more than anything else in this recipe. For root vegetables, aim for 1/16 to 1/8 inch. That is thin enough to crisp in the oven and thick enough that the chip does not shatter into shavings when you lift it off the tray. Set your mandoline and check one slice against a ruler. Kale and brussels sprouts are different: they need to be closer to 1/8 inch so the leaf does not disintegrate.
Keep your work order deliberate to avoid bleeding colour. Slice beets and sweet potato last, and rinse the knife and the mandoline between vegetables. If you are doing a rainbow tray, slice the beets into a separate pile, rinse your hands, and lay them out last on their own section of the pan.
Once sliced, blot the pile on clean paper towels for 10 to 15 minutes and pat the tops dry with a second layer. This is the step people skip, and it is the step that separates a crisp tray from a chewy one. If you want a shortcut, ten minutes in a salad spinner on a low spin works about as well.
Season the Slices Lightly
Put the dried slices in a bowl. Drizzle over the oil, then toss with your hands until every piece has a thin, barely visible sheen. You are looking for coated, not slick. Then add your salt and seasonings and toss again.
Why the oil goes on first: it coats the surface and slows the water escaping, which keeps the slices from flashing to done before the centre dries. Why the seasoning is applied before baking rather than after: the oil is what makes the spices adhere, and any salt added at the end sits on the surface as crystals rather than dissolving into the chip.
Line a baking sheet with parchment. Lay the slices out in a single layer with no overlapping and a little space between each one. If they touch, the trapped steam keeps both pieces damp and they bake into one soft connected sheet. This is the mistake behind most disappointing trays of chips.
When several vegetables go in together, use a separate tray for the ones with different cooking times, or give them different temperature zones. Beet and carrot can go together. Sweet potato needs its own sheet.
Bake Until Crisp
There are two temperatures that work, and the difference matters.
Low and slow, 250F (120C). This dehydrates rather than browns. Chips take 45 to 70 minutes and stay pale, which means the flavour stays vegetable-like. It is the most forgiving setting and the one to use when you are making chips for the first time.
Faster, 350F (175C). Chips crisp in 20 to 30 minutes and brown, so edges caramelize. It is faster but narrower: the edges burn before the centres dry if the slices are any thicker than 1/16 inch. Use a single tray in the middle of the oven and check it early.
Whichever you pick, the process is the same. Bake on a rack in the middle of the oven so heat circulates on both sides. At the halfway point, turn every slice with a thin spatula or a pair of tongs, and swap the tray to the other rack if you are running two.
Rough timing, from the oven to the cooling rack:
- Carrot, parsnip, turnip, rutabaga, celery root: 20 to 30 minutes at 350F, or 45 to 55 minutes at 250F.
- Potato and sweet potato: 25 to 35 minutes at 350F, or 60 to 75 minutes at 250F. Sweet potato burns fastest, so check it early and often.
- Beet: 20 to 30 minutes at 350F, or 45 to 60 minutes at 250F.
- Kale and brussels sprouts: 12 to 18 minutes at 325F, or 25 to 35 minutes at 250F.
How you know they are done: the slices look translucent where they were opaque, the edges have lifted and curled slightly, and the surface is dry and matte rather than glossy. Lift one off the parchment and bend it. It should snap cleanly. If it flexes without breaking, it needs another 5 minutes.
On watching them: yes, watch them. A user on r/Paleo described baking at 400F and flipping at 10 to 12 minutes, then giving it another 8 minutes, with the note that you have to stand there and watch or they burn. That is the honest experience. Set a timer for five minutes rather than relying on the oven light.
Cool and Store the Chips
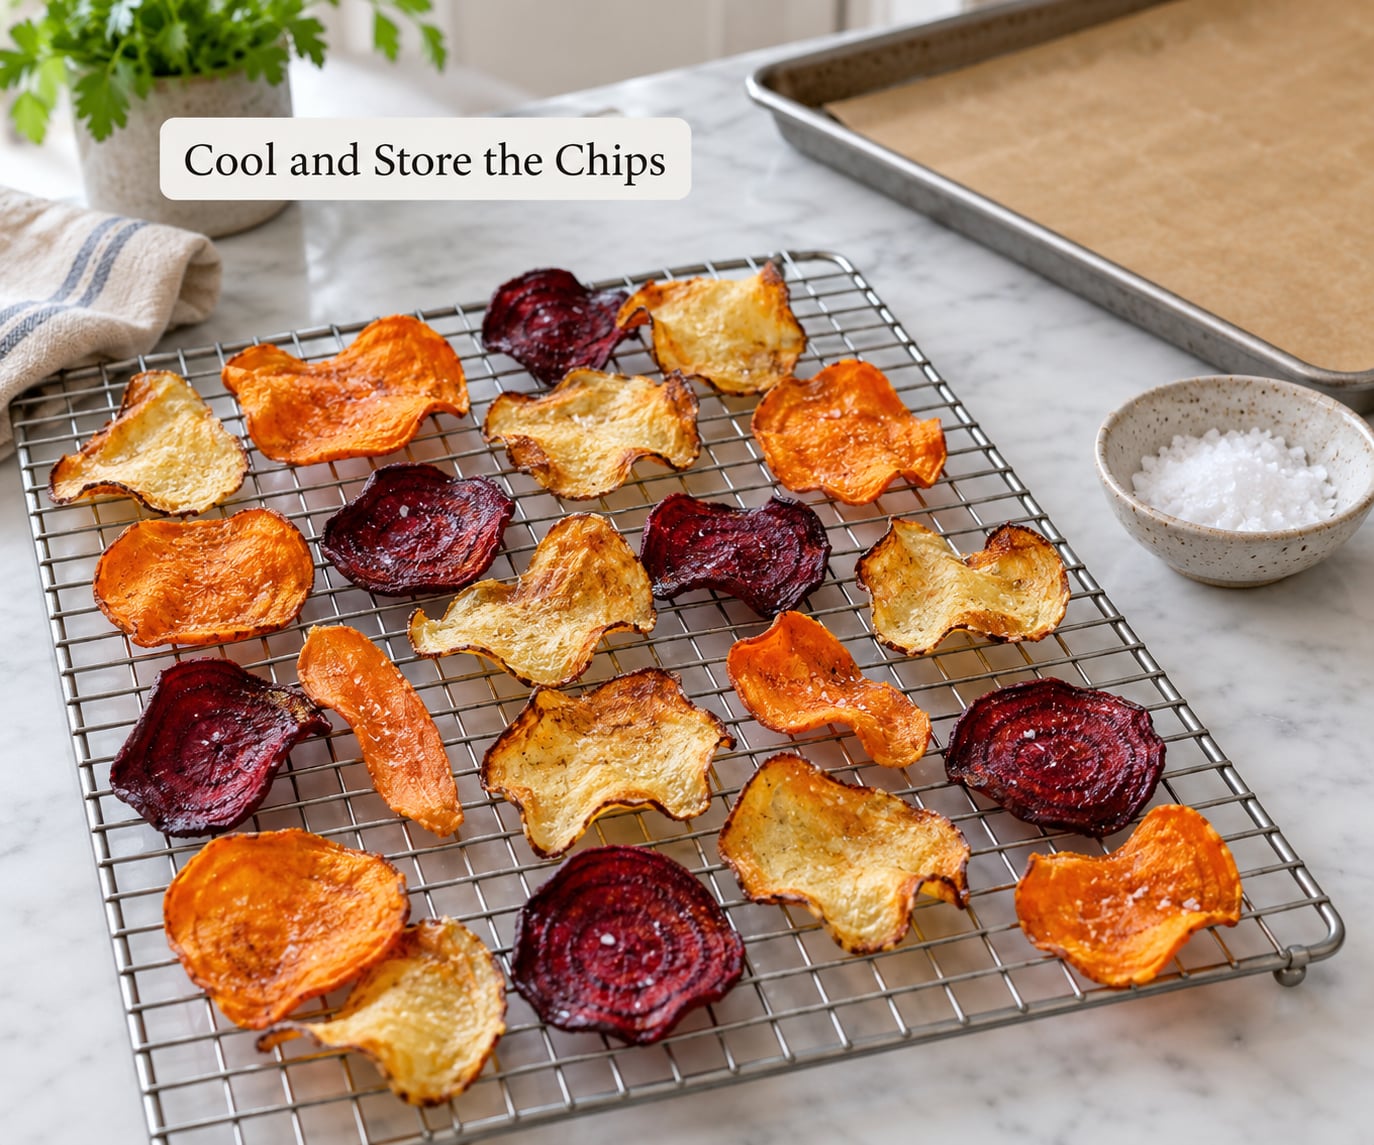
Chip crispness finishes off the heat, not in it. Take the trays out and move the slices onto a wire cooling rack so air circulates under them. Cooling them on the baking sheet traps steam underneath and softens the bottom face, which is why many people think their chips were overcooked when they were simply cooled wrong.
Let them cool completely, about 20 minutes, before you pack them away. They will finish crisping as they cool and feel noticeably harder and crunchier at the 20 minute mark than at the 5 minute mark.
Store in an airtight metal container with a paper towel in the bottom to absorb any residual condensation. Airtight matters more than metal, though metal is better because plastic leaches a little oil into the chips and makes them soft faster.
Be realistic about timing. Crisp chips stay good for 24 to 48 hours in a sealed container, and they are at their best on the day they are baked. After about a week, expect them to be dull but still edible. That matches what people report in forums, where the most common advice is simply to eat them the same day.
If a batch softens, spread it on a baking sheet and put it in a 300F (150C) oven for 5 to 8 minutes. That dries them out again just as well as it did the first time.
Common Mistakes
The edges burn while the centres stay wet. This is the single most common complaint, and it is a temperature problem, not a timing problem. Above about 375F, the outside of a slice dries and browns in minutes while the water trapped in the middle is still there. Drop to 250F or 325F and slice thinner. The same complaint shows up constantly on r/Cooking, with carrots, zucchini and turnips all named as culprits, and low and slow is the answer that keeps coming back.
The chips stay soft or chewy. Too much water, not enough time. Three fixes, in order: blot the slices properly before seasoning, give them more space on the tray, and extend the bake by five minutes. Also check your oven is actually at the temperature you set, because a thermometer that reads 25 degrees low will quietly turn a 35 minute bake into a 50 minute one.
The chips are greasy rather than crisp. You used too much oil, or you did not drain or blot it well. Oil has to bake off for the outside to feel crisp, and a heavy coat insulates the chip instead. One tablespoon per pound is the safe starting point. If you used two and they came out greasy, the second tablespoon was doing nothing but making them heavy.
The chips curl up and are inedibly salty. Seasoned too heavily, and seasoned too late. A chip loses a large share of its volume in the oven, so the salt you added concentrates. Start at half the amount you think you need and taste one before adding more. Chips with no oil absorb salt differently than oiled ones, so go even lighter on oil-free batches.
The chips cook unevenly within one tray. Uneven slicing, or a crowded tray. Set your mandoline once and do not adjust it mid-batch. If the slices vary a lot, sort them into a thin tray and a thick tray before baking.
They are limp the next day. Storage, not baking. Cool them fully, store them airtight, and keep the paper towel in the container. A container that is only partly closed lets moisture back in.
Then there are the two alternative methods worth knowing, since people ask about them constantly.
Air fryer, 350F, 18 to 22 minutes. Dry the slices first as described, toss with a teaspoon of oil per pound rather than a tablespoon, and lay them in the basket in a single layer without shaking. Check at 10 minutes, toss, then check every 3 minutes after. The air fryer browns fast, so it is closer to the higher oven method than the low one.
Dehydrator, 135F to 140F, 6 to 10 hours. No oil, no salt, just sliced vegetables on trays with a drop of lemon juice on top if you want to hold color. Check after 6 hours and rotate trays. Once a piece snaps, take the whole tray out, because leaving finished chips in a warm dehydrator keeps them brittle and eventually scorched. The dehydrator is the only method that makes cucumber and tomato plausible, and even then results vary.
Microwave, 3 to 4 minutes on high. Chips on a paper towel, massaged with a little oil and salt first. They crisp in about three minutes but they re-soften within an hour as the air cools. It is a five-minute hack for a small batch, not a batch method. Every single-chip air fryer and dehydrator works the same principle.
Two other variations worth a line each. An oil-free batch skips the oil entirely, seasons after the bake, and stays crisp because the cellulose is the structure, though you lose some browning. And on using up a garden surplus, chips are one of the few ways to preserve a large zucchini or squash haul that will not keep, since you are removing the water that is the reason they spoil.
Frequently Asked Questions
Which vegetables work best for homemade veggie chips?
Low-moisture vegetables work best: sweet potato, potato, beet, parsnip, carrot, turnip, rutabaga, celery root, kabocha squash, kale and brussels sprouts. They hold their structure when sliced paper thin and release water quickly in a warm oven. Avoid tomato, cucumber, eggplant and summer squash, which carry so much water that the edges burn before the middle dries. Zucchini is the in-between case: it works in a dehydrator or the coolest oven, and it softens again within a day.
How thin should I slice vegetables for crispy chips?
For root vegetables and firm squash, slice between 1/16 and 1/8 inch, aiming for the thinner end when your oven runs hot. Check your first slice against a ruler rather than guessing. Kale and brussels sprouts want to be closer to 1/8 inch so the leaf does not crumble. Thick slices stay chewy in the middle no matter how long you bake them, and very thin slices shatter when you try to lift them off the tray.
Why are my homemade veggie chips chewy?
Chewy chips means water is still inside them. The usual causes are not blotting the slices dry before seasoning, crowding the tray so slices touch and steam each other, and simply not baking long enough. Fix all three: pat the slices on paper towels for 10 to 15 minutes, leave a finger width between every piece, and give the tray another 5 minutes. Chips are done when they snap rather than flex when you lift one.
Can I make veggie chips without oil?
Yes, and they will still crisp, because the cell structure of the vegetable is what gives a chip its body. Skip the oil, season after baking so nothing is wasted, and add a light coat of oil only if you want browning and stronger spice adhesion. Oil-free chips are less forgiving about thickness, since there is no fat layer to soften the surface, so slice toward 1/16 inch. They also re-soften faster, so make smaller batches.
How do I stop sweet potato chips from burning?
Sweet potato has more sugar than most vegetables, so it browns and burns long before the water inside it has gone. Give it its own tray, slice it at 1/16 inch, and bake at 250F rather than 350F, which takes 60 to 75 minutes but cooks it evenly. Turn the slices at the halfway point and start checking the tray at 20 minutes. If you want the caramelised flavour at higher heat, pull the tray the moment the edges colour, since residual heat keeps cooking them.
Can I use a dehydrator or air fryer instead of an oven?
Both work well and both change the settings. A dehydrator runs at 135F to 140F for 6 to 10 hours with no oil or salt, and gives the crispest, lightest result. An air fryer runs at 350F for 18 to 22 minutes with roughly a teaspoon of oil per pound, and browns rather than dehydrates, so check it often. A conventional oven at 250F sits between the two: slower than an air fryer, far quicker than a dehydrator.
Conclusion
Start with the slicing. Get the vegetables as even and as thin as you can manage, measure your first slice against a ruler, and blot the pile dry before anything else touches it. If you follow only that one habit, most of the soggy-tray complaints disappear on their own.
Then make a small batch of a single vegetable, carrot or parsnip are the forgiving ones to learn on. Season lightly, bake at 250F, and taste one chip at the halfway mark to decide whether you want more salt or more time. Once that one tray comes out well, add sweet potato and treat it as a separate project on its own tray.
If you want more ideas for using the same vegetables in a snack context, my trail mix recipe takes about the same amount of chopping and stores just as well for a week of lunches.